當人們嘗試用 python-evdev 的 uinput 時,也許早已發現那個程式必須冠以 sudo 才能執行?
pi@raspberrypi ~sudo python3 Python 3.2.3 (default, Mar 1 2013, 11:53:50) [GCC 4.6.3] on linux2 Type "help", "copyright", "credits" or "license" for more information. >>> from evdev import uinput, ecodes as e >>> with uinput.UInput() as ui: ... ui.write(e.EV_KEY, e.KEY_LEFTSHIFT, 1) ... ui.write(e.EV_KEY, e.KEY_A, 1) ... ui.syn() ... >>>
為什麼呢? Linux 是多人多工的作業環境 ,各種裝置設備有著一種分享觀,所以需要管理,以避免系統資源之不當使用。所以即使在只有一人擁有的情況下,那個人也就得要負起管理責任。雖說今天早就是個人電腦的時代,這個『root』與『sudo』問題也爭議多年 。由於『網路資安』的風險越來越高,或許學點正統管理辦法未嘗不是件好事,就讓我們來改善 user pi 的使用權限吧!
【/dev/uinput 的原本權限是 root only】
因此只有 super user 可以使用這個裝置
pi@raspberrypi /devsudo nano /etc/udev/rules.d/70-uinput.rules # 內容一行 KERNEL=="uinput", GROUP="uinput", MODE="0660" # 建立新群組 group pi@raspberrypi ~
sudo adduser pi uinput # 重新開機,重啟 udev pi@raspberrypi ~
sudo rmmod uinput Error: Module uinput is not currently loaded pi@raspberrypi ~
ls /dev/uinput -l crw-rw---T 1 root uinput 10, 223 8月 18 10:42 /dev/uinput
前面引用的例子,其實有個出處︰
Simulate keystroke in linux with Python
|
Consider python-uinput and evdev. Example of |
|||
|
之所以用這個例子,是希望說明『整體理解』的重要性。比方說,有人在鍵盤上打了一個 A 鍵,假使根本沒有應用程式在讀取鍵盤,將會發生什麼事情呢?這個『模糊』的問題是沒有『正確答案』的 !因為系統『環境設定』之不同,結果可以非常不一樣。因此如果想要『測試』那個程式,也許可以
一、 進入 raspbian 視窗環境,打開 lxterminal ,當作接收端。
二、 使用ssh -l pi 樹莓派 IP 遠端登入,作為程式執行端。
如此將會見到
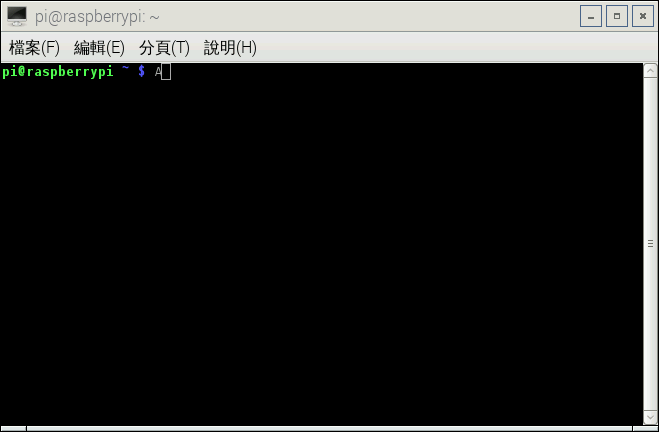
的也!!
於此再舉
gpio-evdev-driver
polls GPIO events on the Raspberry Pi and maps them to keyboard events.
The code was intended to be used with RetroPie: http://blog.petrockblock.com/retropie/ and custom input hardware which is directly hooked up to the GPIO pins of the Pi. Similar projects (also based on uinput, listed below) exist, but none of them worked for my particular configuration so I decided to start a new one.
The code polls for low-active signals! It sets the input pins up with the internat pull-up resistors, so the default state is HIGH. After a pin is connected to GND, an input event is triggered, which fires a keyboard event.
When running the code for the first time, it will ask you to define a keyboard event to be sent for each user action in ACTIONS. The same goes for GPIO events (falling edges). Currently, you revert the configuration by simply deleting the corresponding *.p files. ……
這個網頁,給有興趣的讀者。同時附以用之改寫的 PiTFT GPIO 按鍵轉碼鍵盤程式,以為範例︰
import RPi.GPIO as GPIO
from time import sleep
import pickle
from os.path import isfile
from evdev import InputDevice, UInput, categorize, ecodes
from sys import stdout

入針 = [17,22,23,27] # pins to be 輪詢ed (all others are ignored)
多少入針 = len(入針)
鍵盤保存檔 = 'keys.p' # key configuration (action -> key)
按鍵保存檔 = 'gpio.p' # gpio configuration (action -> gpio pin)
動作 = ['Menu', 'Up', 'Down', 'ESC'] # list of user 動作 (should be <= 入針)
輪詢時距 = 0.01 # in seconds

# setup input pins to use pull-up resistors
def 設定入針():
        for pin in 入針:
                print("輪詢ing pin %d" % pin)
                GPIO.setup(pin, GPIO.IN, pull_up_down=GPIO.PUD_UP)

# 輪詢ing loop
def 輪詢(mapping):
        state = dict(zip(入針,多少入針*[1])) # default pin state (working with low-active signals here)
        uinput = UInput()

        while True:
                for pin in 入針:
                        pval = state[pin] # previous pin state
                        val = GPIO.input(pin) # current pin state

                        # detect edges
                        if not pval and val: # rising edge
                                #print("rising edge at pin %d -> %s up" % (pin,ecodes.KEY[mapping[pin]]))
                                uinput.write(ecodes.EV_KEY, mapping[pin], 0)  # key up
                                uinput.syn()
                        elif pval and not val: # falling edge
                                #print("falling edge at pin %d -> %s down" % (pin, ecodes.KEY[mapping[pin]]))
                                uinput.write(ecodes.EV_KEY, mapping[pin], 1)  # key down
                                uinput.syn()

                        state[pin] = val # update pin state

                sleep(輪詢時距) # wait for next 輪詢ing cycle

# waits for and returns key down event
def wait_key(dev):
        for event in dev.read_loop():
                if event.type == ecodes.EV_KEY and event.value == 1: # key down
                        return event

# waits for falling edge and returns corresponding input pin
def wait_falling_edge():
        while True:
                for pin in 入針:
                        if GPIO.input(pin) == 0:
                                return pin
        sleep(輪詢時距)

# print() without linebreak
def printf(string):
        stdout.write(string)
        stdout.flush()

# prompts for keyboard events to be sent for each user action (action->key mapping)
def 規劃鍵盤鍵(dev):
        keys = dict()
        for action in 動作:
                printf("press key for %s ... " % action)
                while True:
                        event = wait_key(dev)
                        if event.code not in keys.values():
                                break
                printf("%s\n" % ecodes.KEY[event.code])
                keys[action] = event.code
        return keys

# prompts for GPIO events that should trigger the user 動作 (action->pin mapping)
def 規劃開關鍵():
        gpio = dict()
        for action in 動作:
                printf("press button for %s ... " % action)
                while True:
                        pin = wait_falling_edge()
                        if pin not in gpio.values():
                                break
                printf("%d\n" % pin)
                gpio[action] = pin
        return gpio

# reads action->key mapping from config file, starts configuration if file not yet exists
def read_keys():
        if not isfile(鍵盤保存檔):
                keyboard = InputDevice('/dev/input/event1')
                keys = 規劃鍵盤鍵(keyboard)
                pickle.dump(keys, open(鍵盤保存檔,'wb'))
        else:
                keys = pickle.load(open(鍵盤保存檔, 'rb'))
        return keys

# reads action->pin mapping from config file, starts configuration if file not yet exists
def read_gpio():
        if not isfile(按鍵保存檔):
                gpio = 規劃開關鍵()
                pickle.dump(gpio, open(按鍵保存檔,'wb'))
        else:
                gpio = pickle.load(open(按鍵保存檔, 'rb'))
        return gpio

# creates pin->key mapping for all user 動作
def create_mapping(gpio, keys):
        mapping = dict()
        for action in 動作:
                mapping[gpio[action]] = keys[action]
        return mapping


GPIO.setmode(GPIO.BCM)
設定入針()

keys = read_keys()
gpio = read_gpio()
mapping = create_mapping(gpio, keys)

輪詢(mapping)
※ 註記︰樹莓派官方板 raspbian 已經將 Kernel 版本更新至 4.1.6 。