Notice: Trying to access array offset on value of type bool in /home1/freesand/public_html/wp-content/plugins/wiki-embed/WikiEmbed.php on line 112

Notice: Trying to access array offset on value of type bool in /home1/freesand/public_html/wp-content/plugins/wiki-embed/WikiEmbed.php on line 112

Notice: Trying to access array offset on value of type bool in /home1/freesand/public_html/wp-content/plugins/wiki-embed/WikiEmbed.php on line 116
FreeSandal | 輕。鬆。學。部落客 | 第 262 頁

勇闖新世界︰ W!o《卡夫卡村》變形祭︰感知自然‧外傳‧四

何謂『靈感』 Inspiration ?它能夠被傳授的嗎?? ASTROPI 網頁上的一段圖文,


Seeking Inspiration

Themes

Astro Pi Competition Winners Announced!!

Primary school winning schools:

  • Cumnor House Girls’ School
  • Cranmere Primary School

Secondary school winning schools:

  • Thirsk School
  • Cottenham Village College
  • Westminster School
  • Lincoln UTC
  • Magdalen College School

Read more on the Raspberry Pi blog


讓人深思是否『團隊合作』競技奪魁,是達成『寓教於樂』之良方 ?它能夠啟發『創造思維』的動機??

『啟蒙』之說由來古矣。《易》曰︰

蒙 ䷃ :亨。 匪我求童蒙,童蒙求我。 初噬告,再三瀆,瀆則不告 。利貞。

彖曰:蒙,山下有險,險而止,蒙。 蒙亨,以亨行時中也。匪我求童蒙,童蒙求我,志應也。 初噬告,以剛中也。再三瀆, 瀆則不告 ,瀆蒙也。 蒙以養正,聖功也。

象曰:山下出泉,蒙﹔君子以果行育德。

其象以內 ☵ 坎『險』易『陷』,擁有無窮之『好奇心』。臨外 ☶ 艮『止』能『高』,孕育無盡的『求知慾』。有此好『山』好『水』內外培育之境,自能領悟造化神奇,焉能不會創思泉湧的呢??他山之石,可以攻錯耶!今之所失,或許在欲速則不達,因其欲揠苗助長乎!!


人因工學』 Human Factors

人因工程學(又稱工效學[1]人機工程學[2]人類工效學人體工學人因學)是一門重要的工程技術學科,為管理科學工業工程專業的一個分支,是研究機器環境的相互作用及其合理結合,使設計的機器和環境系統適合人的生理心理等 特點,達到在生產中提高效率、安全、健康和舒適目的的一門科學。其中側重於研究人對環境的精神認知稱為 cognitive ergonomics 或 human factors,而側重於研究環境施加給人的物理影響稱為 physical ergonomics 或 occupational biomechanics。作為一門綜合性邊緣學科,它的研究和應用範圍非常廣泛,因此人們試圖從各種角度命名定義它。


230px-Kieler_Puppe  汽車人體工學設計模板


探討『人機界面』,以人為中心,談人與器物的互動、操作和控制 。以此角度來看『 8×8 RGB 顯示陣列』以及『小型搖桿』構成的『Sense HAT』使用者界面,到底足不足夠的呢?或許只需要考察『器物發展史』自能得其答案的吧!也許所謂『限制』條件,有時正是創造『自由』之契機哩!!


勇闖新世界︰ W!o《卡夫卡村》變形祭︰感知自然‧外傳‧三

假使從

Astro Pi: Flight Hardware Tech Specs

Astro_Pi_Logo_WEB-300px

Inputs

  • PCB-mounted 5-button miniature joystick: Alps SKRHABE010 (data sheet)
    Up, down, left, right and middle click. This will emulate the keyboard cursor keys and Enter for the middle click. Accessible via standard Linux event system /dev/input/event*
  • Additional GPIO push buttons will be accessible on the side of the aluminium flight case for functions such as controlled shut-down and reset. These will also be usable in your code via GPIO interrupt detection or polling. You are welcome to re-create them manually on your Astro Pi with any type of push button you have to hand.
  • Standard Pi Camera Module (sensor data sheet)
  • Pi NoIR Camera Module


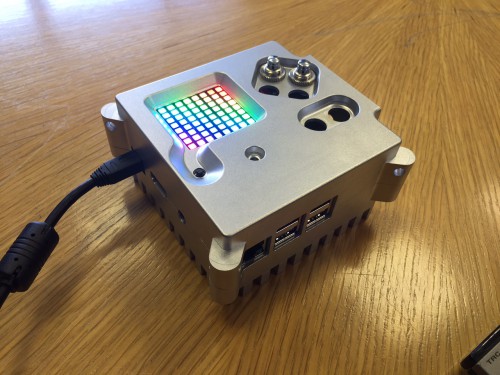
我們可以知道,『 Sense HAT 』裡有一個『小型搖桿』,在 Linux 系統上將被模擬成鍵盤。如果閱讀核心輸出訊息,可以發現︰


[    5.400635] rpi-sense 1-0046: Raspberry Pi Sense HAT firmware version 0
[    5.440842] input: Raspberry Pi Sense HAT Joystick as /devices/virtual/input/input2
[    5.466825] fb1: RPi-Sense FB frame buffer device


然而要如何確認它被模擬成了鍵盤?以及送出什麼鍵盤碼的呢??假使熟悉

勇闖新世界︰ 《 Kernel 4.X 》之整裝蓄勢‧設備管理及應用‧二上

勇闖新世界︰ 《 Kernel 4.X 》之整裝蓄勢‧設備管理及應用‧三上

系列文本的讀者,可以用


pi@raspberrypi ~ $ python3
Python 3.2.3 (default, Mar  1 2013, 11:53:50) 
[GCC 4.6.3] on linux2
Type "help", "copyright", "credits" or "license" for more information.
>>> from evdev import InputDevice, list_devices

# 取得系統所有的輸入設備
>>> 輸入裝置列 =  [InputDevice(fn) for fn in list_devices()]
>>> for 裝置 in 輸入裝置列:
...     print(裝置.fn, 裝置.name, 裝置.phys)
... 
/dev/input/event1 Logitech USB Receiver usb-3f980000.usb-1.5.3/input1
/dev/input/event0 Logitech USB Receiver usb-3f980000.usb-1.5.3/input0
/dev/input/event2 Raspberry Pi Sense HAT Joystick rpi-sense-joy/input0

# 選擇搖桿
>>> 裝置 = InputDevice('/dev/input/event2')
>>> print(裝置)
device /dev/input/event2, name "Raspberry Pi Sense HAT Joystick", phys "rpi-sense-joy/input0"

# 裝置詳細功能
>>> 裝置.capabilities(verbose=True)
{('EV_KEY', 1): [('KEY_ENTER', 28), ('KEY_UP', 103), ('KEY_LEFT', 105), ('KEY_RIGHT', 106), ('KEY_DOWN', 108)], ('EV_SYN', 0): [('SYN_REPORT', 0), ('SYN_CONFIG', 1), ('?', 20)]}
>>> 裝置.capabilities()
{0: [0, 1, 20], 1: [28, 103, 105, 106, 108]}

# 搖桿功能測試
>>> 搖桿裝置 = 裝置
>>> from evdev import categorize, ecodes
>>> for 事件 in 搖桿裝置.read_loop():
...     if 事件.type == ecodes.EV_KEY:
...         print(categorize(事件))
...         print(事件)
... 
key event at 1442301324.053264, 103 (KEY_UP), hold
event at 1442301324.053264, code 103, type 01, val 02
key event at 1442301324.093247, 103 (KEY_UP), hold
event at 1442301324.093247, code 103, type 01, val 02
key event at 1442301324.126043, 103 (KEY_UP), up
event at 1442301324.126043, code 103, type 01, val 00
key event at 1442301327.065373, 108 (KEY_DOWN), down
event at 1442301327.065373, code 108, type 01, val 01
key event at 1442301327.313266, 108 (KEY_DOWN), hold
event at 1442301327.313266, code 108, type 01, val 02
key event at 1442301327.336501, 108 (KEY_DOWN), up
event at 1442301327.336501, code 108, type 01, val 00
key event at 1442301331.887788, 105 (KEY_LEFT), down
event at 1442301331.887788, code 105, type 01, val 01
key event at 1442301332.133269, 105 (KEY_LEFT), hold
event at 1442301332.133269, code 105, type 01, val 02
key event at 1442301332.144608, 105 (KEY_LEFT), up
event at 1442301332.144608, code 105, type 01, val 00
key event at 1442301333.899522, 106 (KEY_RIGHT), down
event at 1442301333.899522, code 106, type 01, val 01
key event at 1442301334.142136, 106 (KEY_RIGHT), up
event at 1442301334.142136, code 106, type 01, val 00
key event at 1442301335.854223, 28 (KEY_ENTER), down
event at 1442301335.854223, code 28, type 01, val 01
key event at 1442301336.096757, 28 (KEY_ENTER), up
event at 1442301336.096757, code 28, type 01, val 00
^CTraceback (most recent call last):
  File "<stdin>", line 1, in <module>
  File "/usr/local/lib/python3.2/dist-packages/evdev/device.py", line 280, in read_loop
    r, w, x = select([self.fd], [], [])
KeyboardInterrupt
>>> 


來作確認。如是不但能夠解讀


【 pygame_joystick.py 】

#!/usr/bin/python
from sense_hat import SenseHat
import os
import time
import pygame  # See http://www.pygame.org/docs
from pygame.locals import *


print("Press Escape to quit")
time.sleep(1)

pygame.init()
pygame.display.set_mode((640, 480))

sense = SenseHat()
sense.clear()  # Blank the LED matrix

# 0, 0 = Top left
# 7, 7 = Bottom right
UP_PIXELS = [[3, 0], [4, 0]]
DOWN_PIXELS = [[3, 7], [4, 7]]
LEFT_PIXELS = [[0, 3], [0, 4]]
RIGHT_PIXELS = [[7, 3], [7, 4]]
CENTRE_PIXELS = [[3, 3], [4, 3], [3, 4], [4, 4]]


def set_pixels(pixels, col):
    for p in pixels:
        sense.set_pixel(p[0], p[1], col[0], col[1], col[2])


def handle_event(event, colour):
    if event.key == pygame.K_DOWN:
        set_pixels(DOWN_PIXELS, colour)
    elif event.key == pygame.K_UP:
        set_pixels(UP_PIXELS, colour)
    elif event.key == pygame.K_LEFT:
        set_pixels(LEFT_PIXELS, colour)
    elif event.key == pygame.K_RIGHT:
        set_pixels(RIGHT_PIXELS, colour)
    elif event.key == pygame.K_RETURN:
        set_pixels(CENTRE_PIXELS, colour)


running = True

BLACK = [0, 0, 0]
WHITE = [255, 255, 255]

while running:
    for event in pygame.event.get():
        if event.type == pygame.QUIT:
            running = False
        if event.type == KEYDOWN:
            if event.key == K_ESCAPE:
                running = False
            handle_event(event, WHITE)
        if event.type == KEYUP:
            handle_event(event, BLACK)


,也曉得即使不用『 pygame 』程式庫,該如何使用這個『搖桿』的了。


─── 學習似乎總是前後相隨並且環環相扣的耶!!
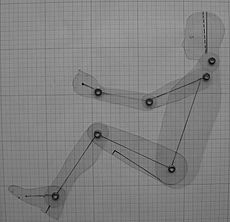


勇闖新世界︰ W!o《卡夫卡村》變形祭︰感知自然‧外傳‧二

若問一個『 8×8 』的 RGB 顯示陣列,在這個『高清』與『 超高清』的時代,又能做些什麼的呢?

coordinates

  • the blue pixel is at coordinates (0, 2)
  • the red pixel is at coordinates (7, 4)


如果我們將之比較

M♪o 之學習筆記本《辰》組元︰【䷋】有命無咎

文本中的『七段顯示器』

生 ︰『七段數碼管』因藉七個發光二極體以不同組合來顯示數字而得名,又叫作『七段顯示器』,簡稱『數碼管』。

Seven-segment display

A seven-segment display (SSD), or seven-segment indicator, is a form of electronic display device for displaying decimal numerals that is an alternative to the more complex dot matrix displays.

Seven-segment displays are widely used in digital clocks, electronic meters, basic calculators, and other electronic devices that display numerical information.[1]

Concept and visual structure

85px-Seven_segment_display-animated 220px-7_segment_display_labeled.svg

960px-7-segment.svg

───

那個顯示陣列可以表達 { ( 2^8 \cdot 2^8 \cdot 2^8 ) } ^{64} 
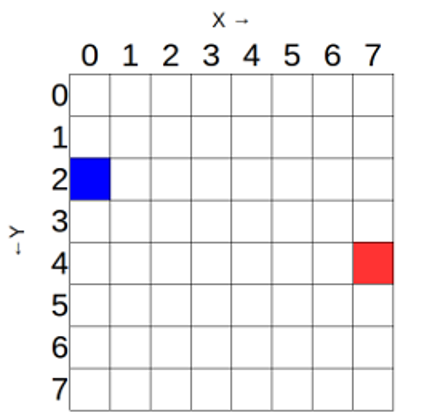
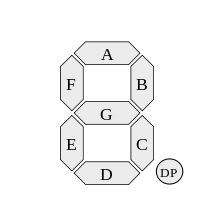
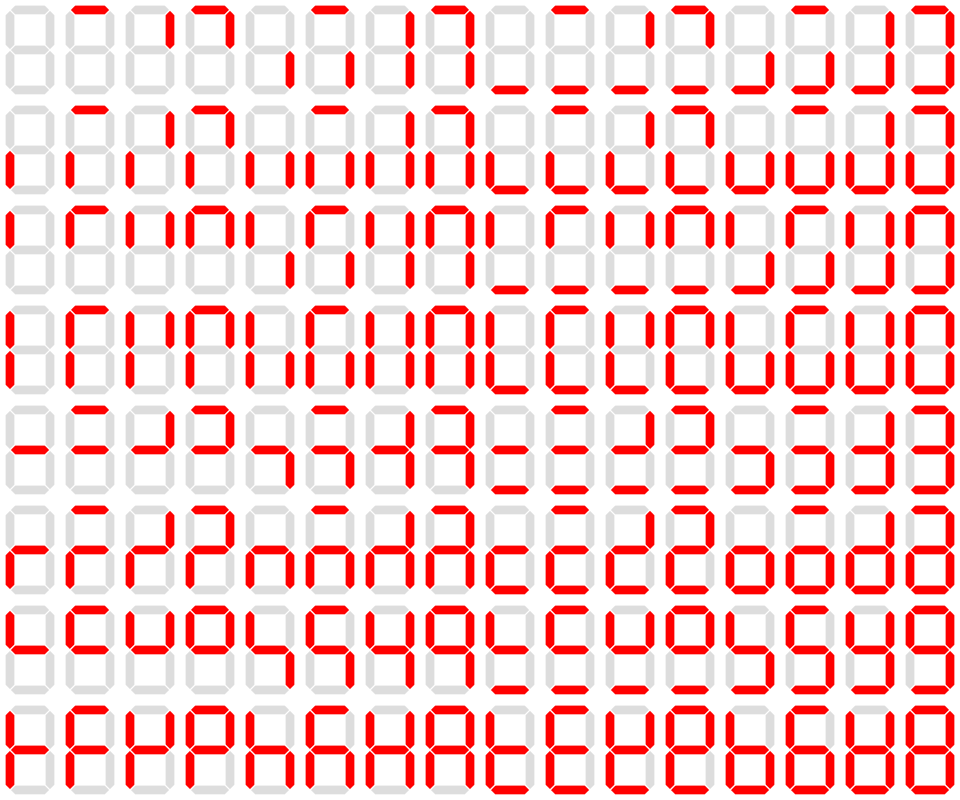
那麼多種帶色形狀。其數量之大,或許應足以激發人之『想像力』的了!假使思考『電阻色碼 』、『顏色溫標』、『除錯卡‧碼』…… 可能的應用組合,實無可盡算。或許真該問的問題是︰當如何『清晰明白』的『呈現資訊』的呢??當其輔之以『跑馬燈』之移動顯示,一如『七段顯示器』文中談的

派︰視覺暫留是什麼?《 網 》網上講︰

視覺暫留(英 文:Persistence of vision)是光對視網膜所產生的視覺,在光停止作用後,仍保留一段時間的現象,其具體應用是電影的拍攝和放映。原因是由視神經的反應速度造成的,其時 值約是1/16秒,對於不同頻率的光有不同的暫留時間。是動畫、電影等視覺媒體形成和傳播的根據。比如:直視太陽數秒後,人眼將殘留一個強光源的影像。我 們日常使用的日光燈每秒大約熄滅100餘次,但我們基本感覺不到日光燈的閃動。這都是因為視覺暫留的作用。所以,要達成最基本的視覺暫留效果至少需要 10fps(參考視頻的幀率)。

220px-Animhorse

馬不停蹄

───

,更能強化此『表現空間』。或正是因此之故,『 Sense HAT API』的參考文件,絕大部分都在講這個『顯示陣列』的用法。要是從『教育』之目的而言,說道『想像力』之培養,自古以來常盼望能有更好的『教學工具』。『 Astro Pi 』也許是個開始的吧!『 Sense HAT 』的明天,或可期待的耶!!

作者思規劃用此『顯示陣列』,以『顏色』、『象形』、『指示』 、…… 等等『形色元素』,能以跑馬動態呈現『會意』,用來演示《 易 》易經『萬象宇宙』。或將可『表象』古人之『想像力』於萬一,也許能『呈現』張衡的『候風地動儀』之機先。因為此工程浩大,細節還未確定,一時尚且難以完成,待完成後再與讀者分享乎??

卦象

八卦的代表符號由三演變而成。八卦所代表的意像茲詳列如下:

八卦
卦象 卦名 自然象徵 性情 家族關係 動物 身體部位 器官 先天八卦方位 後天八卦方位 五行 二進位 Unicode編碼
西北 111 U+2630
少女 東南 西 110 U+2631
中女 膽囊 101 U+2632
長男 東北 100 U+2633
長女 西南 東南 011 U+2634
中男 西 010 U+2635
少男 西北 東北 001 U+2636
西南 000 U+2637

宋代朱熹在《周易本義》中寫了一首《八卦取象歌》幫助人記住八卦的卦象:

乾三連(),坤六斷(☷);
震仰盂(☳),艮覆碗(☶);
離中虛(☲),坎中滿(☵);
兌上缺(☱),巽下斷(☴)。

背誦時可與「先天八卦圖」對應:由(乾)上而下,由(坤)左至右而上。


六十四卦圓方圖

圓圖

六十四卦圓圖(外圍)

邵雍以先天六十四卦方位圖為本,作《皇極經世》所適用的象數法則,大至元、會、運、世,小至年、月、日、時[2],推演天道的消長與人事(朝代國運)的治亂興廢。

方圖

六十四卦方圖,《宋元學案》稱為「方圖四分四層圖」:把六十四卦圓圖,依演化順序分成八等分,由坤卦起依次排列,形成一個八乘八的方陣。

Trigramme2637 ☷.svg

坤(地)

Trigramme2636 ☶.svg

艮(山)

Trigramme2635 ☵.svg

坎(水)

Trigramme2634 ☴.svg

巽(風)

Trigramme2633 ☳.svg

震(雷)

Trigramme2632 ☲.svg

離(火)

Trigramme2631 ☱.svg

兌(澤)

Trigramme2630 ☰.svg

乾(天)

← 上卦
↓ 下卦
Iching-hexagram-02.svg

2. 坤為地

Iching-hexagram-23.svg

23. 山地剝

Iching-hexagram-08.svg

8. 水地比

Iching-hexagram-20.svg

20. 風地觀

Iching-hexagram-16.svg

16. 雷地豫

Iching-hexagram-35.svg

35. 火地晉

Iching-hexagram-45.svg

45. 澤地萃

Iching-hexagram-12.svg

12. 天地否

Trigramme2637 ☷.svg

坤(地)

Iching-hexagram-15.svg

15. 地山謙

Iching-hexagram-52.svg

52. 艮為山

Iching-hexagram-39.svg

39. 水山蹇

Iching-hexagram-53.svg

53. 風山漸

Iching-hexagram-62.svg

62. 雷山小過

Iching-hexagram-56.svg

56. 火山旅

Iching-hexagram-31.svg

31. 澤山咸

Iching-hexagram-33.svg

33. 天山遯

Trigramme2636 ☶.svg

艮(山)

Iching-hexagram-07.svg

7. 地水師

Iching-hexagram-04.svg

4. 山水蒙

Iching-hexagram-29.svg

29. 坎為水

Iching-hexagram-59.svg

59. 風水渙

Iching-hexagram-40.svg

40. 雷水解

Iching-hexagram-64.svg

64. 火水未濟

Iching-hexagram-47.svg

47. 澤水困

Iching-hexagram-06.svg

6. 天水訟

Trigramme2635 ☵.svg

坎(水)

Iching-hexagram-46.svg

46. 地風升

Iching-hexagram-18.svg

18. 山風蠱

Iching-hexagram-48.svg

48. 水風井

Iching-hexagram-57.svg

57. 巽為風

Iching-hexagram-32.svg

32. 雷風恆

Iching-hexagram-50.svg

50. 火風鼎

Iching-hexagram-28.svg

28. 澤風大過

Iching-hexagram-44.svg

44. 天風姤

Trigramme2634 ☴.svg

巽(風)

Iching-hexagram-24.svg

24. 地雷復

Iching-hexagram-27.svg

27. 山雷頤

Iching-hexagram-03.svg

3. 水雷屯

Iching-hexagram-42.svg

42. 風雷益

Iching-hexagram-51.svg

51. 震為雷

Iching-hexagram-21.svg

21. 火雷噬嗑

Iching-hexagram-17.svg

17. 澤雷隨

Iching-hexagram-25.svg

25. 天雷無妄

Trigramme2633 ☳.svg

震(雷)

Iching-hexagram-36.svg

36. 地火明夷

Iching-hexagram-22.svg

22. 山火賁

Iching-hexagram-63.svg

63. 水火既濟

Iching-hexagram-37.svg

37. 風火家人

Iching-hexagram-55.svg

55. 雷火豐

Iching-hexagram-30.svg

30. 離為火

Iching-hexagram-49.svg

49. 澤火革

Iching-hexagram-13.svg

13. 天火同人

Trigramme2632 ☲.svg

離(火)

Iching-hexagram-19.svg

19. 地澤臨

Iching-hexagram-41.svg

41. 山澤損

Iching-hexagram-60.svg

60. 水澤節

Iching-hexagram-61.svg

61. 風澤中孚

Iching-hexagram-54.svg

54. 雷澤歸妹

Iching-hexagram-38.svg

38. 火澤睽

Iching-hexagram-58.svg

58. 兌為澤

Iching-hexagram-10.svg

10. 天澤履

Trigramme2631 ☱.svg

兌(澤)

Iching-hexagram-11.svg

11. 地天泰

Iching-hexagram-26.svg

26. 山天大畜

Iching-hexagram-05.svg

5. 水天需

Iching-hexagram-09.svg

9. 風天小畜

Iching-hexagram-34.svg

34. 雷天大壯

Iching-hexagram-14.svg

14. 火天大有

Iching-hexagram-43.svg

43. 澤天夬

Iching-hexagram-01.svg

1. 乾為天

Trigramme2630 ☰.svg

乾(天)

圖形對稱

以圖的中心為基點,恰好是一個對稱圖形,也就是相對位置上,兩卦的陰陽剛好相反(錯卦)。

內外四層
  • 最內層為「巽、恆、益、震」4個卦
  • 圍繞在外有12個卦(坎、渙、解、未濟、井、鼎、屯、噬嗑、既濟、家人、豐、離)
  • 又外一層為20個卦(艮、蹇、漸、小過、旅、咸、蒙、困、蠱、大過、頤、隨、賁、革、損、節、中孚、歸妹、睽、兌)
  • 最外層有28個卦(坤、剝、比、觀、豫、晉、萃、否、謙、遯、師、訟、升、姤、復、無妄、明夷、同人、臨、履、泰、大畜、需、小畜、大壯、大有、夬、乾卦)

其中「4、12、20、28」恰好形成一等差數列

八純卦連成一線

由右下角往左上方,分別為「乾、兌、離、震、巽、坎、艮、坤」八純卦。


勇闖新世界︰ W!o《卡夫卡村》變形祭︰感知自然‧外傳‧一

傳說 IBM 起始了『 Thinking 』之座右銘,  Apple 改變為『 Thinking Different 』, Nokia 曾經想『 Thinking Smart 』。然而不論『水平思考』全方位盡圓周,『垂直思考』窮碧落至黃泉,這種『思考』仍舊是個『平面』不是個『立體』。或許『因何』而思?『為何』而考??一樣是『思考』的重要向度,如是『思考』將有『價值』之尺度,能以『信念』為中心,認真的對待事物的『價值均衡』。或可了當下追求『富裕』,卻是流於『貪婪』,一切講求『方便』 ,其實製造『浪費』的現狀。將能解『氣候變遷』與『經濟發展』間之『論辯』,方踏出『面對問題』的第一步耶!!

有人認為『思考』就是解決『問題』。不過『問題之先』也許沒有『問題』,那麼應該『如何思考』的呢?事實上,考慮『為何問』 、『如何答』與『問答之先』是什麼?也就是神奇之『切入點』,淵源於一長串『之先』之『之前』的『偶然之思』。彷彿《易》曰︰陰陽不測謂之神。『潛潛之思』虛無飄渺的『問題前意識』或許先行於『意識』,替苦苦『追尋者』開道的乎??

要是有人問︰說欲找 Sense HAT 的資料先從 AstroPi  找起,對嗎?

假使有人答之以『是』,此事『 SenseHAT 』的『變更紀錄』上有

Sense HAT Changelog
v2
2.1.0
Added gamma, low light and other properties

2.0.0
Library renamed from astro_pi to sense_hat
Class renamed from AstroPi to SenseHat
API otherwise unchanged

v1
1.1.6
Updated IMU settings file path

1.1.5
Introduced IMU settings file

1.1.4
Made _get_char_pixels return cloned lists

1.1.0
Fixed bug in show_letter

1.0.0
API design confirmed

v0
0.0.0
Alpha status


將如何思考這個『問與答』的呢?如果只看待成『 Q&A 』或僅開啟未來之『 Q 』與『 A 』的吧!假使設想『問』有『緣起之因』,『答』有『事物之法』,或能見『問答』之『因緣生法』的耶?!因此這可以是講『閱讀』思考之法之『外傳』的也!!


比方講,如果人們想知道『 astro-pi.org 』的理念,不妨瀏覽網頁,接著仔細讀讀『 FAQs


,然後自有一番通盤了解。之後當看到『 ISS 』名稱時,知道它是 International Space Station 的縮寫,指的是『國際太空站』。因為樹莓派基金會的『 Sense HAT 』承襲『 Astro Pi 』的發展而來,也可以說是乘載相似的『設計理念』。又由『變更紀錄』推斷可能是類似之『硬體構成』,再輔之以 Astro Pi 『硬體描述』,前面問題的答案可說是『毫無疑問』的哩!如是跟著 Astro Pi 『資源』走,

Resources

Additional resources on various topics have been consolidated here for your reference.

  • Want to learn how to use the Astro Pi HAT board and sensors? Then click here to find guides and worksheets designed to provide you with an understanding of the hardware and its capabilities. It will introduce you to what the board does, how to set it up, how to write your first program, and how to use the HAT’s many features.
  • Learn how to control the LED matrix, collect sensor data from the world around you, and combine these ideas into a number of small projects by following this example.
  • You are encouraged to browse the education resources created for all ages. These activities will provide you with the background knowledge to understand the challenges and opportunities presented by putting the Astro Pi in space. The activities can form a unit of work or can be used individually to enrich your knowledge.
  • An Astro Pi forum has been created for you to join in the discussions, ask questions, get advice, and to share ideas!
  • Source code for the Astro Pi and Hat board can be found here and example programs can be found here.
  • With the flight case now complete, we’ve clarified the buttons that are available for Tim to interact with the Astro Pi. A new resource has been added to the Raspberry Pi community page all about the buttons and you can find it here.

Astro Pi integrated into flight case to be used on the International Space Station.


見其『 example 』範例卻是通往樹莓派基金會之

Getting Started with the Sense HAT


或非但不會引以為異,反倒稱讚合作美談的哩!!


勇闖新世界︰ W!o《卡夫卡村》變形祭︰感知自然‧教外別傳

關於 Sense HAT 的簡介,因為樹莓派基金會之

Buy the Sense HAT – as seen in space*!

……

The board itself has a suite of sensors, a “D-pad” style 5-button joystick and an 8×8 RGB LED matrix driven by a combination of an LED driver chip and an Atmel AVR microcontroller – an ATTiny88.

For the terminally curious, here are the schematics of the board.

The Sense HAT and its Pi tucked snugly in the Astro Pi flight case

Here’s the hardware run-down:

Sensing elements:

Pressure / Temperature
ST Micro LPS25H
– 24-bit pressure measurement resolution (260hPa to 1260hPa)
– 16-bit temperature measurement resolution (0-125°C)
Datasheet

Humidity / Temperature
ST Micro HTS221
– 16-bit humidity measurement resolution (0-100% relative humidity)
– 16-bit temperature measurement resolution (0-60°C)
Datasheet

Acceleration/Gyroscope/Magnetic field
ST Micro LSM9DS1
– 9 degrees of freedom (X, Y, Z independent axes for all sensors)
– ±16 g acceleration measurement range
– ±16 gauss magnetometer measurement range
– ±2000 dps (degrees per second) gyroscope measurement range
Each of these measurement channels has 16 bits of resolution.
Datasheet

All of these sensors have features for periodic sampling of sensor values – complete with internal FIFO storage. The LPS25H and HTS221 have maximum sample rates of 25 per second, the LSM9DS1 has a maximum sample rate of 952Hz – we are already imagining the birth of a million Pi-controlled stunt quadcopters.

LED Matrix
The LED matrix is driven by a combination of a constant-current LED driver and an Atmel ATTiny88 running a custom firmware that delivers an 8×8 display with 15-bit resolution RGB colour. If you want to get into the gory details, the AVR firmware is available on Github.

Joystick
The Atmel is responsible for sampling the joystick. We didn’t have enough pins left on the Atmel to dedicate the five that we needed to sample the joystick axes independently, so they’ve been spliced into the LED matrix row selects. The joystick gets updated at approximately 80Hz, which is the scan rate of the LED matrix.

All of the sensors (and the base firmware for the Atmel) are accessible from the Pi over I2C. As a fun bonus mode, the SPI peripheral on the Atmel has been hooked up to the Pi’s SPI interface – you can reprogram your HAT in the field! We use this method to get the firmware into the Atmel during production test – and we leave it unprotected so you can substitute the stock firmware to get it to do whatever you want. Seriously. First person to turn this sensor HAT into a quadcopter controller HAT wins a cookie from me.

Software
If you’re not assembly-language inclined, you can always use the HAT’s sensors from our shipped Python library – standard function calls return sensor values, give you joystick key events and allow you to display things on the LED matrix. The Sense API is available through the Raspbian APT repositories.

To access the magic, simply enter:

sudo apt-get update
sudo apt-get install sense-hat
sudo pip-3.2 install pillow

into a terminal window. Note you will have to reboot for the Sense HAT to be recognised.

The API is well-documented (and tested extensively by schoolchildren as part of Astro-Pi) – get reading here.

───

已道其詳,此處就不再贅述了。雖然說看『電路圖』 schematics 讀『數據表』 datasheet 很枯燥,然而對於深入了解底層的程式或許不可或缺。同時也可明白自己對哪些『術語』較不熟悉,如是將能知道補足的方向。也許正因『新舊交替』之時,某些資訊混亂或可預期。比方講,

Astro Pi – Getting Started Tutorial

部份內容已不適合這個『 Sense HAT 』,目前主要軟體開發網址在

《 RPi-Distro/python-sense-hat

。取得完整『原始碼』及『範例』最簡單的辦法是

git clone https://github.com/RPi-Distro/python-sense-hat.git

。根據實測所知,此程式庫支援派生『二』與『三』。想嚐鮮

python-sense-hat/examples/compass.py

#!/usr/bin/python
import sys
from sense_hat import SenseHat
# To get good results with the magnetometer you must first calibrate it using
# the program in RTIMULib/Linux/RTIMULibCal
# The calibration program will produce the file RTIMULib.ini
# Copy it into the same folder as your Python code


者,務請先仔細讀過

How to calibrate the Magnetometer

by Davespice » Fri May 01, 2015 10:33 am
EDIT: I am leaving this post intact as a reference, but a lot of it is no applicable. Please skip to this post:
https://www.raspberrypi.org/forums/view … 16#p810193
Steps 8 to 19 are still relevant.


Hi all, okay so Astro Pi kits are imminently going to be landing on doorsteps so I thought I should get this information online asap!

You’ll probably have noticed the file RTIMULib.ini appearing in the same folder as your python programs. This is because the Astro Pi python module uses a another library behind the scenes called RTIMU.

The ini file mentioned above is used to store the Magnetometer calibration data. By default your ini files will be empty of calibration data though. Without this data you’ll find that the compass functions don’t behave in the way you expect them to.

For example I expect many of you have found that the compass.py example program shows a blue pixel that doesn’t move very much?

To fix this we need to do two things:

  1. Run the calibration program. This will then create a new copy of RTIMULib.ini containing the Magnetometer calibration data.
  2. Copy the new RTIMULib.ini file to the folder where your python programs are.

───

以免產生疑惑。因是之故,在進入『感知自然』之前,先寫這個『教外別傳』,講講『 Sense HAT 』的點點滴滴,希望能較完整的呈現『 Sense HAT 』之設計理念。


輕。鬆。學。部落客