如果我們知道如何在樹莓派上
Add an I2S mic using device tree & simple-audio-card
Here I’m using an ICS43432. Other I2S mics will likely work with the same steps & codec.
For wiring, see https://github.com/nejohnson2/rpi-i2s
For software, you can either follow the steps there, or do it the modern way here using a device tree overlay.
rpi-i2s
Using the ICS43432 MEMS microphone on a Raspberry Pi with i2s
There has been poor documentation online about using i2s on a RaspberryPi and in particular connecting a MEMs microphone. There is plenty of discussion but no clear tutorial and/or explaination. These notes are meant to be a comprehensive way of connecting a microphone to an RPi over i2s.
Hardware Setup
The following documentation used the ICS43432 MEMs microphone with a breakout board on an RPi 3. Mirophone documentation can be found here. Header pins were soldered to the breakout board. Unfortunately the breakout board was poorly designed and in order to properly install the header pins, the pin labels were covered. Regardless, the connection uses Pulse Code Modulation which requires four GPIO pins from the RPi. The PCM setup can be found here. The connection is as follows: 
Mic - RPi
---------
VCC - 3.3v
Gnd - Gnd
L/R - Gnd (this is used for channel selection. Connect to 3.3 or GND)
SCK - BCM 18 (pin 12)
WS  - BCM 19 (pin 35)
SD  - BCM 20 (pin 38)

………
也許藉著 kernel Simple-Card 之文件說明︰
Simple-Card:

Simple-Card specifies audio DAI connections of SoC <-> codec.

Required properties:

- compatible				: "simple-audio-card"

Optional properties:

- simple-audio-card,name		: User specified audio sound card name, one string
					  property.
- simple-audio-card,widgets		: Please refer to widgets.txt.
- simple-audio-card,routing		: A list of the connections between audio components.
					  Each entry is a pair of strings, the first being the
					  connection's sink, the second being the connection's
					  source.
- simple-audio-card,mclk-fs             : Multiplication factor between stream rate and codec
					  mclk. When defined, mclk-fs property defined in
					  dai-link sub nodes are ignored.
- simple-audio-card,hp-det-gpio		: Reference to GPIO that signals when
					  headphones are attached.
- simple-audio-card,mic-det-gpio	: Reference to GPIO that signals when
					  a microphone is attached.
- simple-audio-card,aux-devs		: List of phandles pointing to auxiliary devices, such
					  as amplifiers, to be added to the sound card.

Optional subnodes:

- simple-audio-card,dai-link		: Container for dai-link level
					  properties and the CPU and CODEC
					  sub-nodes. This container may be
					  omitted when the card has only one
					  DAI link. See the examples and the
					  section below.
或可解讀 seeed-voicecard 之 dts 吧!
pi@raspberrypi:~/seeed-voicecard
果能推知又為立體麥克風嗎?
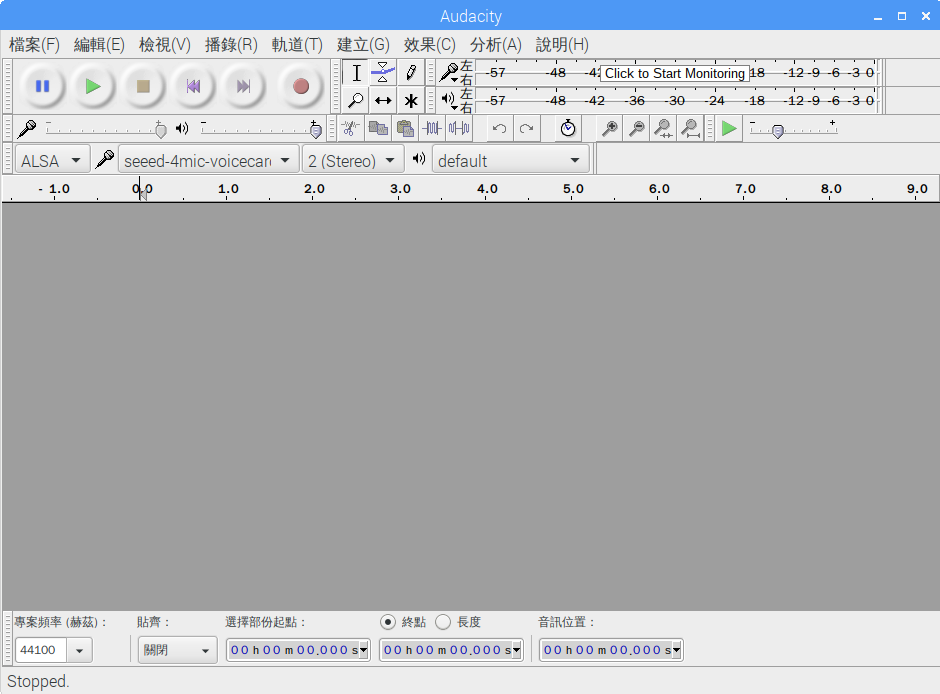
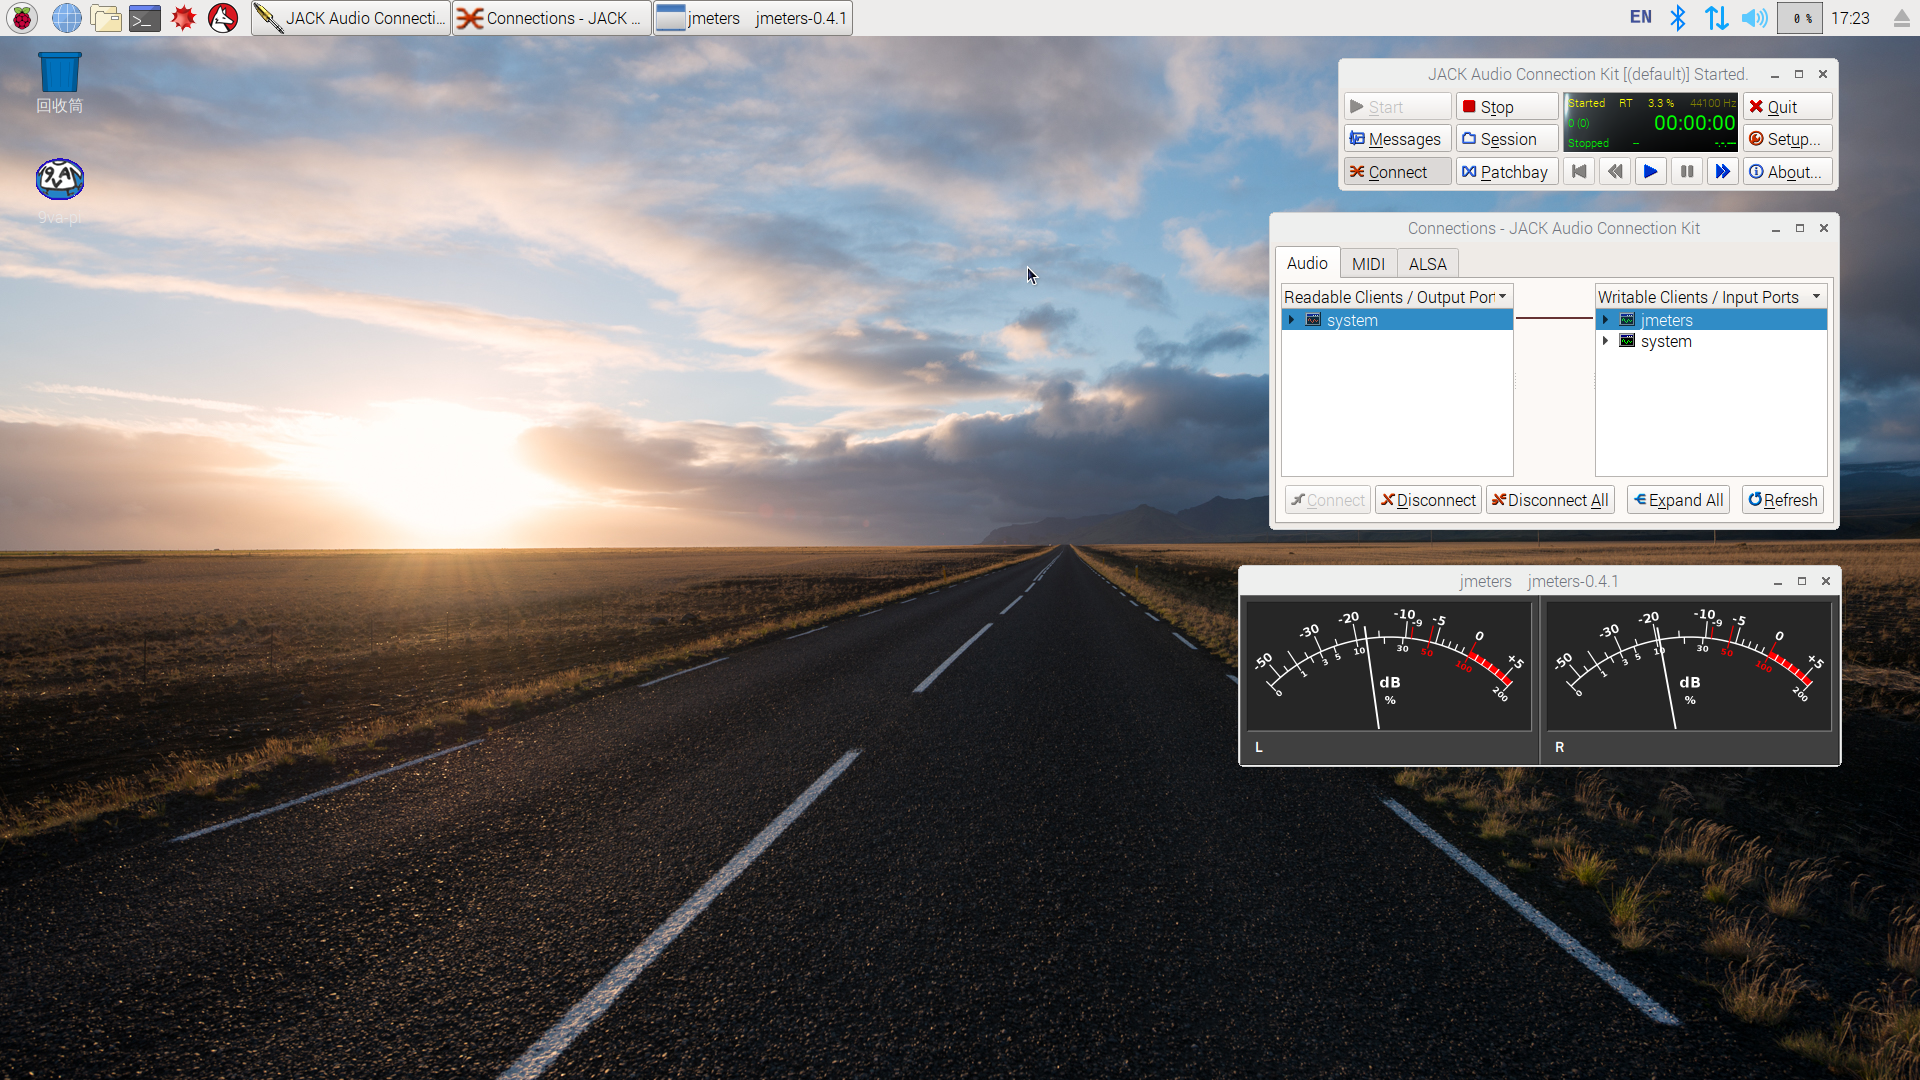
故連偏愛 mmap 之 jackd 亦能用呦◎
且趁此時亦讀讀
Overview

For many microcontrollers, adding audio input is easy with one of our analog microphone breakouts. But as you get to bigger and better microcontrollers and microcomputers, you’ll find that you don’t always have an analog input, or maybe you want to avoid the noise that can seep in with an analog mic system. Once you get past 8-bit micros, you will often find an I2S peripheral, that can take digital audio data in! That’s where this I2S Microphone Breakout comes in.
Instead of an analog output, there are three digital pins: Clock, Data and Word-Select. When connected to your microcontroller/computer, the ‘I2S Master’ will drive the clock and word-select pins at a high frequency and read out the data from the microphone. No analog conversion required!

The microphone is a single mono element. You can select whether you want it to be on the Left or Right channel by connecting the Select pin to power or ground. If you have two microphones, you can set them up to be stereo by sharing the Clock, WS and Data lines but having one with Select to ground, and one with Select to high voltage.

This I2S MEMS microphone is bottom ported, so make sure you have the hole in the bottom facing out towards the sounds you want to read. It’s a 1.6-3.3V device only, so not for use with 5V logic (its really unlikely you’d have a 5V-logic device with I2S anyways). Many beginner microcontroller boards don’t have I2S, so make sure its a supported interface before you try to wire it up! This microphone is best used with Cortex M-series chips like the Arduino Zero, Feather M0, or single-board computers like the Raspberry Pi.
哩☆