差不多先生傳‧胡適
你知道中國最有名的人是誰?提起此人,人人皆曉,處處聞名,他姓差,名不多,是各省各縣各村人氏。你一定見過他,一定聽過別人談起他,差不多先生的名字,天天掛在大家的口頭,因為他是中國全國人的代表。
差不多先生的相貌,和你和我都差不多。他有一雙眼睛,但看的不很清楚;有兩隻耳朵,但聽的不很分明;有鼻子和嘴,但他對於氣味和口味都不很講究;他的腦子也不小,但他的記性卻不很精明,他的思想也不細密。
他常常說:「凡事只要差不多,就好了。何必太精明呢?」
他小時候,他媽叫他去買紅糖,他買了白糖回來,他媽罵他,他搖搖頭道:「紅糖,白糖,不是差不多嗎?」
他在學堂的時候,先生問他:「直隸省的西邊是哪一省?」他說是陝西。先生說:「錯了,是山西,不是陝西。」他說:「陝西同山西,不是差不多嗎?」
後來他在一個錢鋪裏做夥計;他也會寫,也會算,只是總不會精細 ;十字常常寫成千字,千字常常寫成十字。掌櫃的生氣了,常常罵他,他只笑嘻嘻地賠小心道:「千字比十字多一小撇,不是差不多嗎?」
有 一天,他為了一件要緊的事,要搭火車到上海去,他從從容容地走到火車站,遲了兩分鐘,火車已開走了。他白瞪著眼,望著遠遠的火車上的煤煙,搖搖頭道:「只 好明天再走了,今天走同明天走 ,也還差不多;可是火車公司未免太認真了。八點三十分開,同八點三十二分開,不是差不多嗎?」他一面說,一面慢慢地走回家,心裏總不很明白為甚麼火車不肯 等他兩分鐘。
有 一天,他忽然得一急病,趕快叫家人去請東街的汪先生。那家人急急忙忙跑去,一時尋不著東街的汪大夫,卻把西街的牛醫王大夫請來了。差不多先生病在脇上,知 道尋錯了人;但病急了,身上痛苦,心裏焦急,等不得了,心裏想道:「好在王大夫同汪大夫也差不多,讓他試試看罷。」於是這位牛醫王大夫走近脇前,用醫牛的 法子給差不多先生治病。不上一點鐘,差不多先生就一命嗚呼了。
差不多先生差不多要死的時候,一口氣斷斷續續地說道:「活人同死人也差……差……差……不多,……凡事只要……差……差……不多……就……好了,何……必……太……太認真呢?」他說完了這句格言,就絕了氣。
他死後,大家都很稱讚差不多先生樣樣事情看得破,想得通;大家都說他一生不肯認真,不肯算帳,不肯計較,真是一位有德行的人 。於是大家給他取個死後的法號,叫他做圓通大師。
他的名譽愈傳愈遠,愈久愈大,無數無數的人,都學他的榜樣,於是人人都成了一個差不多先生。──然而中國從此就成了一個懶人國了。
試想『相機』所見與『隻眼』相同嗎?之前《光的世界》系列文本已嚐試解說過很多『光學系統』問題哩!
……
─── 《GOPIGO 小汽車︰格點圖像算術《投影幾何》《序》》
怎樣能不做『差不多』先生耶?請讀 three.js 起始文本第一篇︰
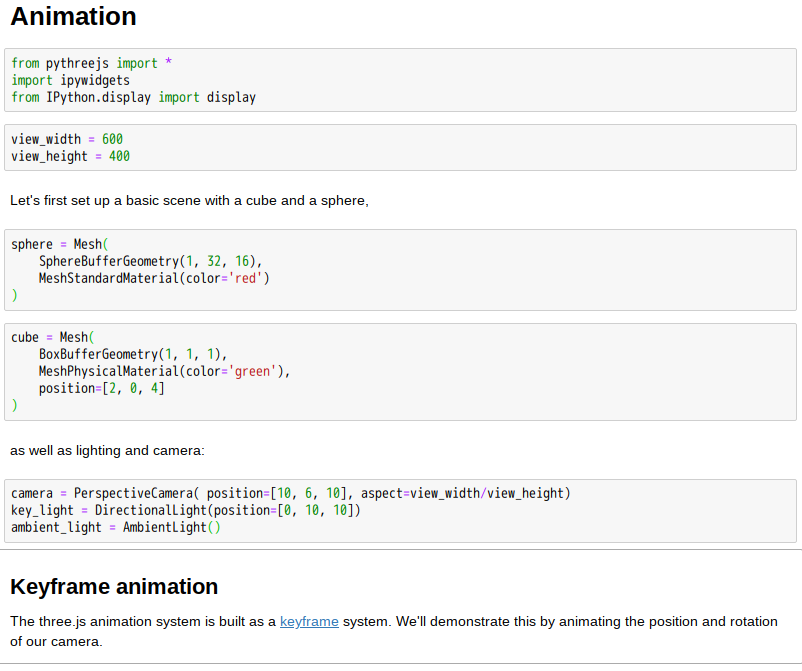
To actually be able to display anything with three.js, we need three things: scene, camera and renderer, so that we can render the scene with camera.
var scene = new THREE.Scene();
var camera = new THREE.PerspectiveCamera( 75, window.innerWidth / window.innerHeight, 0.1, 1000 );

var renderer = new THREE.WebGLRenderer();
renderer.setSize( window.innerWidth, window.innerHeight );
document.body.appendChild( renderer.domElement );
Let’s take a moment to explain what’s going on here. We have now set up the scene, our camera and the renderer.
There are a few different cameras in three.js. For now, let’s use a PerspectiveCamera.
The first attribute is the field of view. FOV is the extent of the scene that is seen on the display at any given moment. The value is in degrees.
The second one is the aspect ratio. You almost always want to use the width of the element divided by the height, or you’ll get the same result as when you play old movies on a widescreen TV – the image looks squished.
The next two attributes are the near and far clipping plane. What that means, is that objects further away from the camera than the value of far or closer than near won’t be rendered. You don’t have to worry about this now, but you may want to use other values in your apps to get better performance.
Next up is the renderer. This is where the magic happens. In addition to the WebGLRenderer we use here, three.js comes with a few others, often used as fallbacks for users with older browsers or for those who don’t have WebGL support for some reason.
In addition to creating the renderer instance, we also need to set the size at which we want it to render our app. It’s a good idea to use the width and height of the area we want to fill with our app – in this case, the width and height of the browser window. For performance intensive apps, you can also give setSize smaller values, like window.innerWidth/2 andwindow.innerHeight/2, which will make the app render at half size.
If you wish to keep the size of your app but render it at a lower resolution, you can do so by calling setSize with false as updateStyle (the third argument). For example,setSize(window.innerWidth/2, window.innerHeight/2, false) will render your app at half resolution, given that your <canvas> has 100% width and height.
Last but not least, we add the renderer element to our HTML document. This is a <canvas> element the renderer uses to display the scene to us.
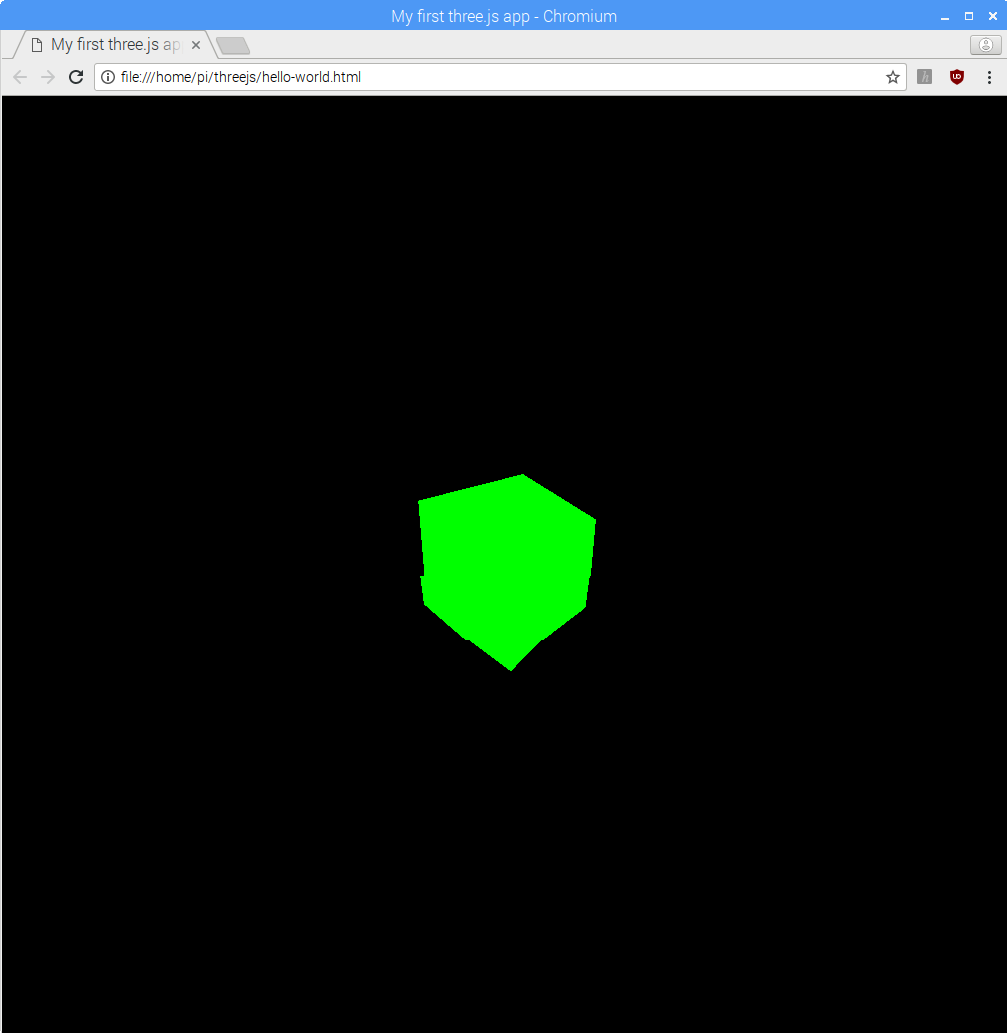
“That’s all good, but where’s that cube you promised?” Let’s add it now.
var geometry = new THREE.BoxGeometry( 1, 1, 1 );
var material = new THREE.MeshBasicMaterial( { color: 0x00ff00 } );
var cube = new THREE.Mesh( geometry, material );
scene.add( cube );

camera.position.z = 5;
To create a cube, we need a BoxGeometry. This is an object that contains all the points (vertices) and fill (faces) of the cube. We’ll explore this more in the future.
In addition to the geometry, we need a material to color it. Three.js comes with several materials, but we’ll stick to the MeshBasicMaterial for now. All materials take an object of properties which will be applied to them. To keep things very simple, we only supply a color attribute of 0x00ff00, which is green. This works the same way that colors work in CSS or Photoshop (hex colors).
The third thing we need is a Mesh. A mesh is an object that takes a geometry, and applies a material to it, which we then can insert to our scene, and move freely around.
By default, when we call scene.add(), the thing we add will be added to the coordinates (0,0,0). This would cause both the camera and the cube to be inside each other. To avoid this, we simply move the camera out a bit.
Rendering the scene
If you copied the code from above into the HTML file we created earlier, you wouldn’t be able to see anything. This is because we’re not actually rendering anything yet. For that, we need what’s called a render or animate loop.
function animate() {
	requestAnimationFrame( animate );
	renderer.render( scene, camera );
}
animate();
This will create a loop that causes the renderer to draw the scene every time the screen is refreshed (on a typical screen this means 60 times per second). If you’re new to writing games in the browser, you might say “why don’t we just create a setInterval ?” The thing is – we could, but requestAnimationFrame has a number of advantages. Perhaps the most important one is that it pauses when the user navigates to another browser tab, hence not wasting their precious processing power and battery life.
Animating the cube
If you insert all the code above into the file you created before we began, you should see a green box. Let’s make it all a little more interesting by rotating it.
Add the following right above the renderer.render call in your animate function:
cube.rotation.x += 0.01;
cube.rotation.y += 0.01;
This will be run every frame (normally 60 times per second), and give the cube a nice rotation animation. Basically, anything you want to move or change while the app is running has to go through the animate loop. You can of course call other functions from there, so that you don’t end up with a animate function that’s hundreds of p.
───
細數其中『術語』有多少懂得不懂得!
再讀 pythreejs 簡介
The pythreejs API attempts to mimic the three.js API as closely as possible, so any resource on its API should also be helpful for understanding pythreejs. See for example the official three.js documentation.
The major difference between the two is the render loop. As we normally do not want to call back to the kernel for every rendered frame, some helper classes have been created to allow for user interaction with the scene with minimal overhead:
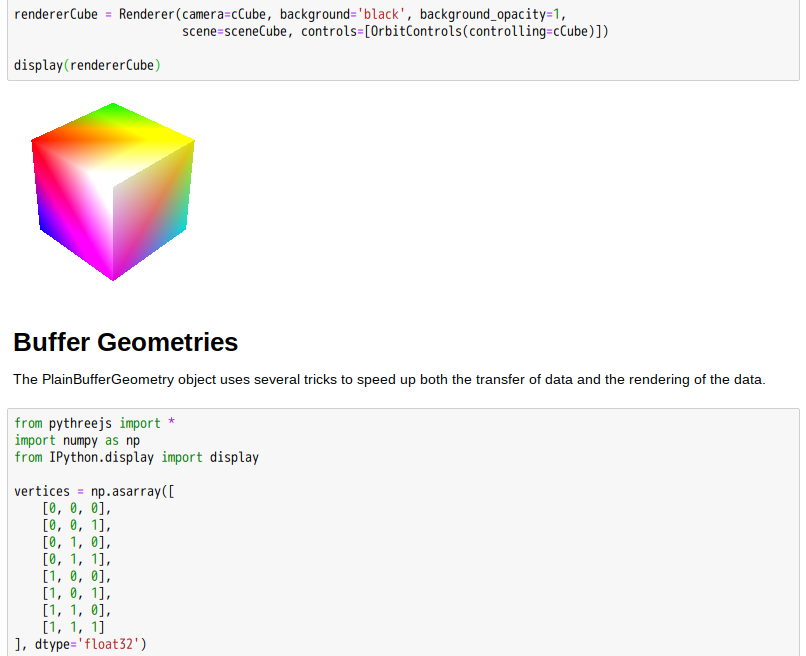
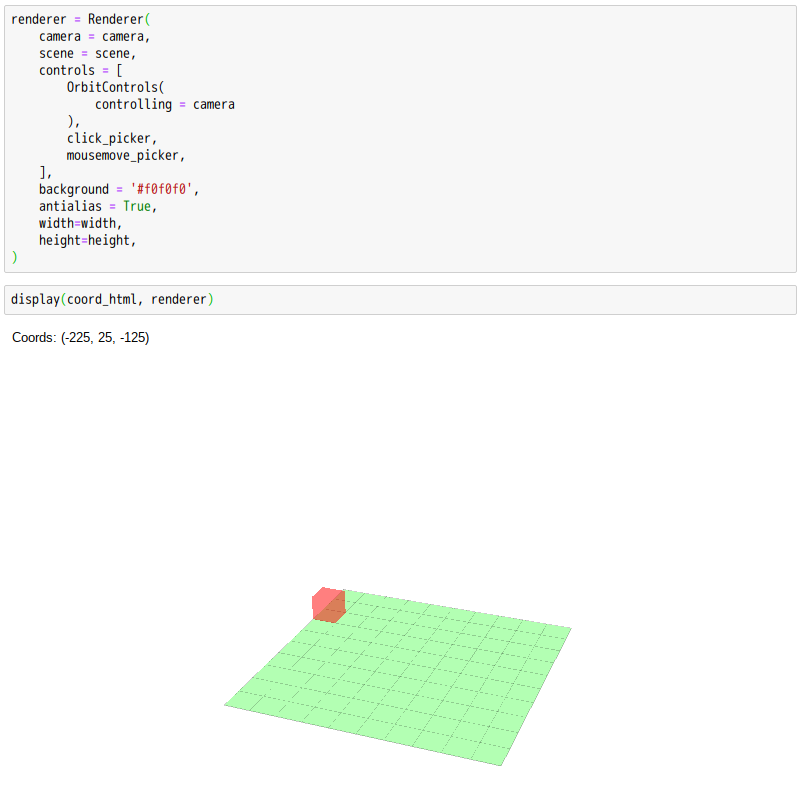
Renderer classes
While the WebGLRenderer class mimics its three.js counterpart in only rendering frames on demand (one frame per call to its render() method), the Renderer class sets up an interactive render loop allowing for Interactive controls and Animation views. Similarly, a Preview widget allows for a quick visualization of various threejs objects.
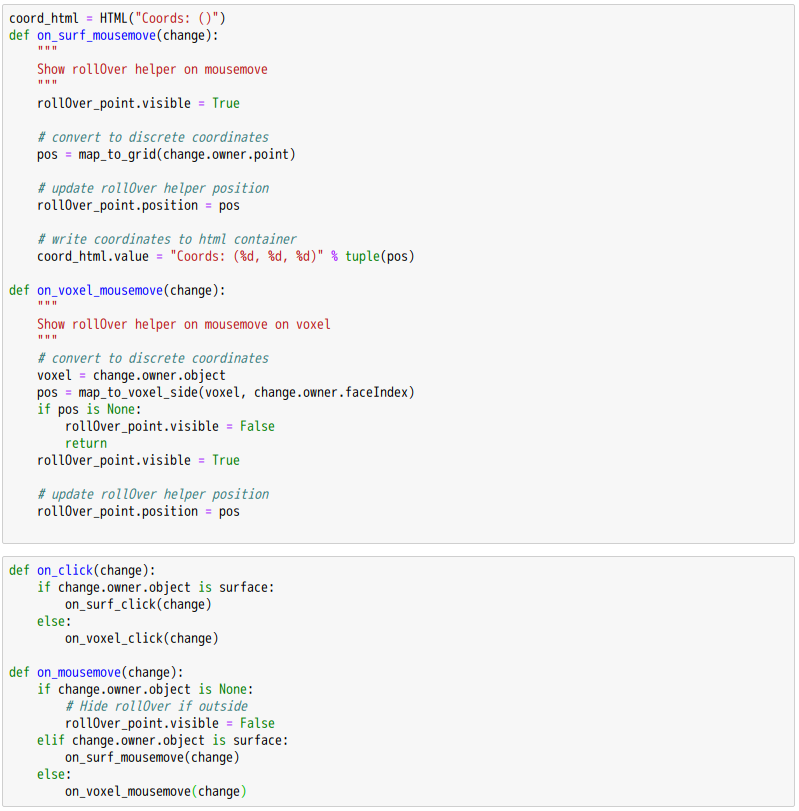
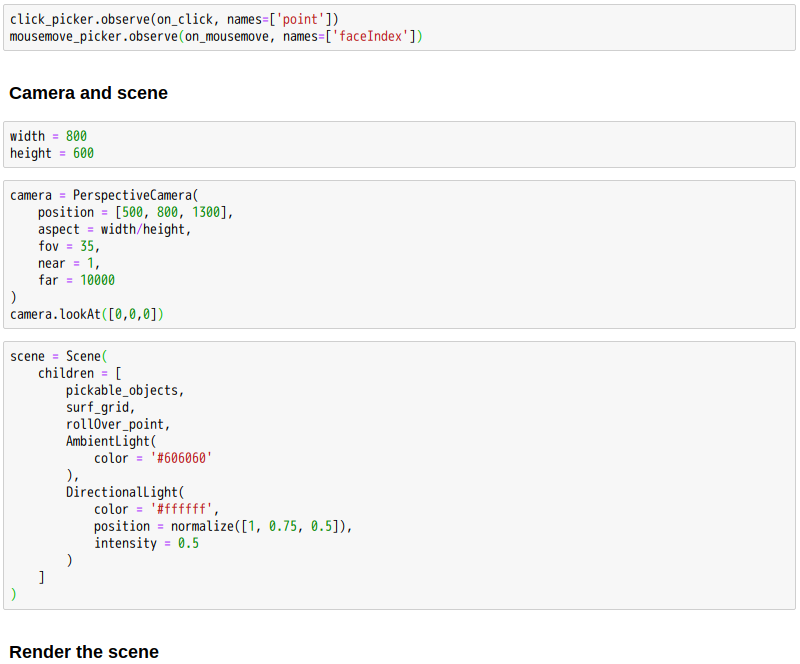
Interactive controls
These are classes for managing user interaction with the WebGL canvas, and translating that into actions. One example is the OrbitControls class, which allows the user to control the camera by zooming, panning, and orbital rotation around a target. Another example is the Picker widget, which allows for getting the objects and surface coordinates underneath the mouse cursor.
To use controls, pass them to the renderer, e.g.:
Renderer(controls=[OrbitControls(...), ...], ...)
Animation views
The view widgets for the AnimationAction class gives interactive controls to the user for controlling a threejs animation.
Other notable deviations from the threejs API are listed below:
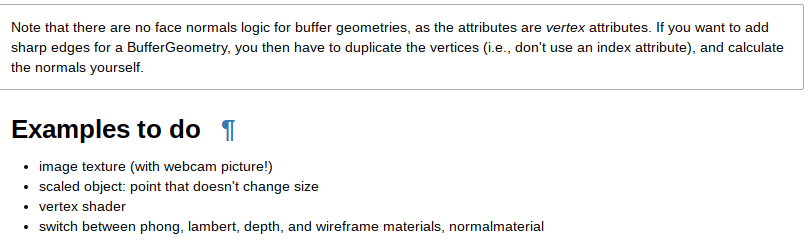
- Buffers are based on numpy arrays, with their inbuilt knowledge of shape and dtype. As such, most threejs APIs that take a buffer are slightly modified (fewer options need to be specified explicitly).
- The generative geometry objects (e.g.
SphereGeometry and BoxBufferGeometry) do not sync their vertices or similar data by default. To gain acess to the generated data, convert them to either the Geometry or BufferGeometry type with the from_geometry() factory method.
- Methods are often not mirrored to the Python side. However, they can be executed with the
exec_three_obj_method() method. Consider contributing to make methods directly available. Possibly, these can be auto-generated as well.
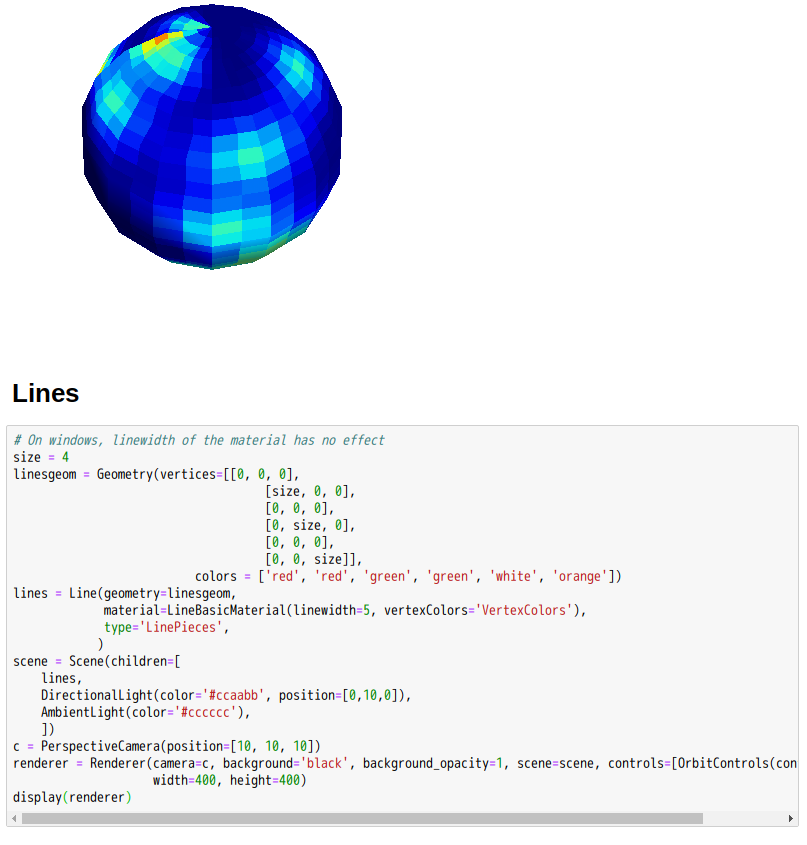
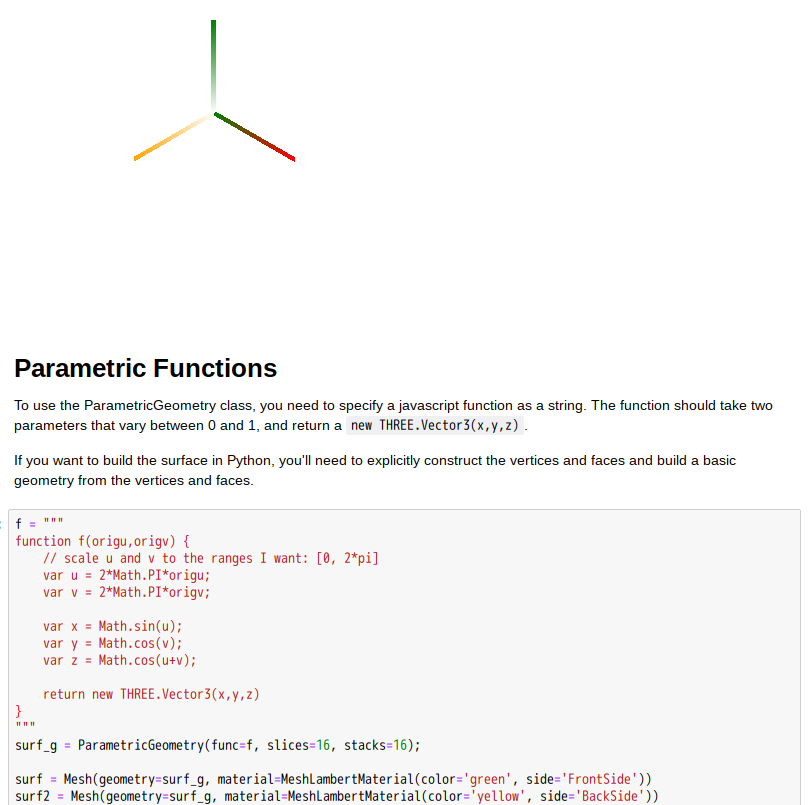
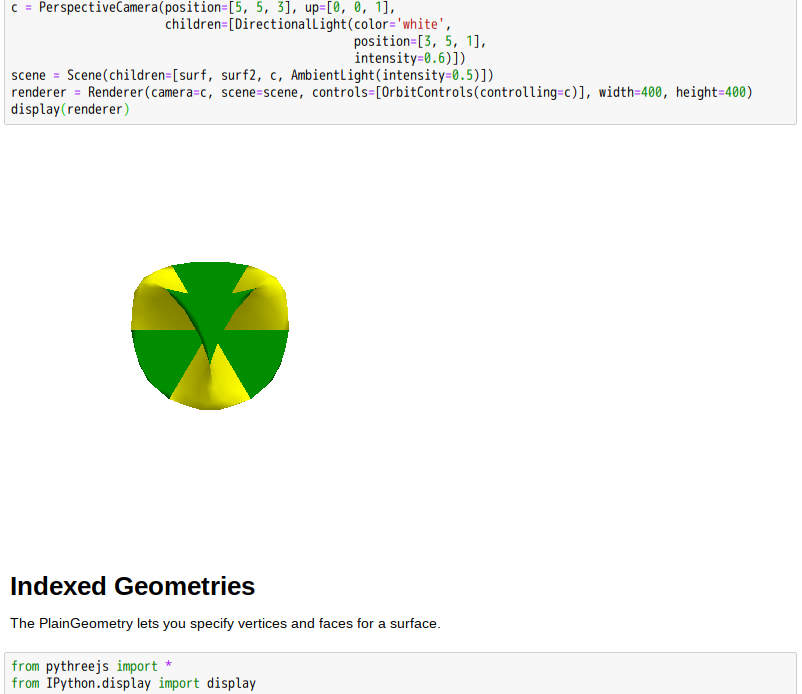
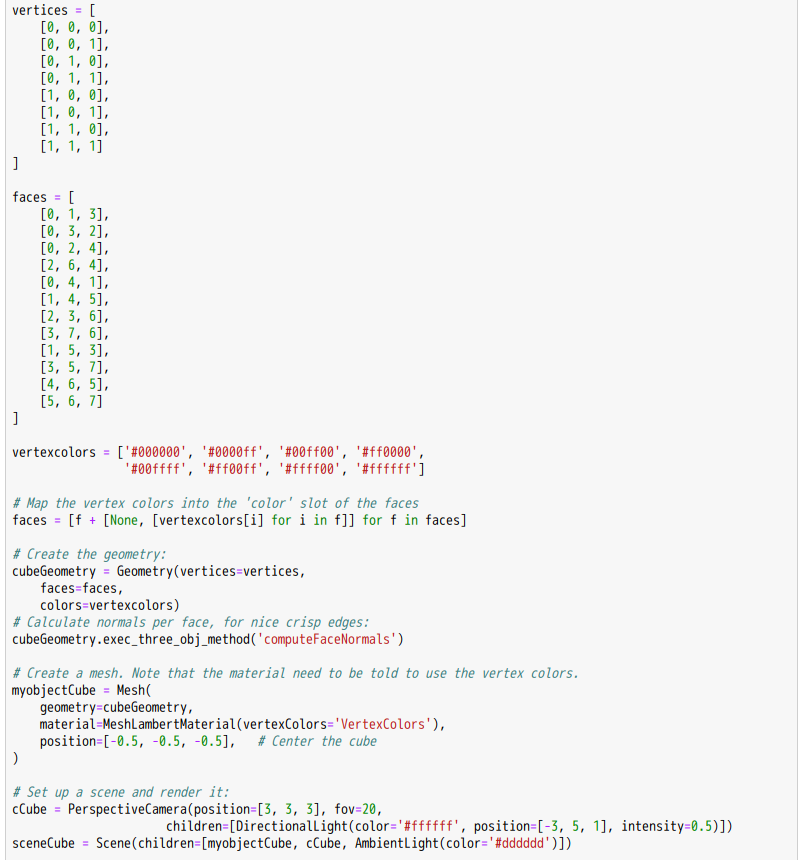
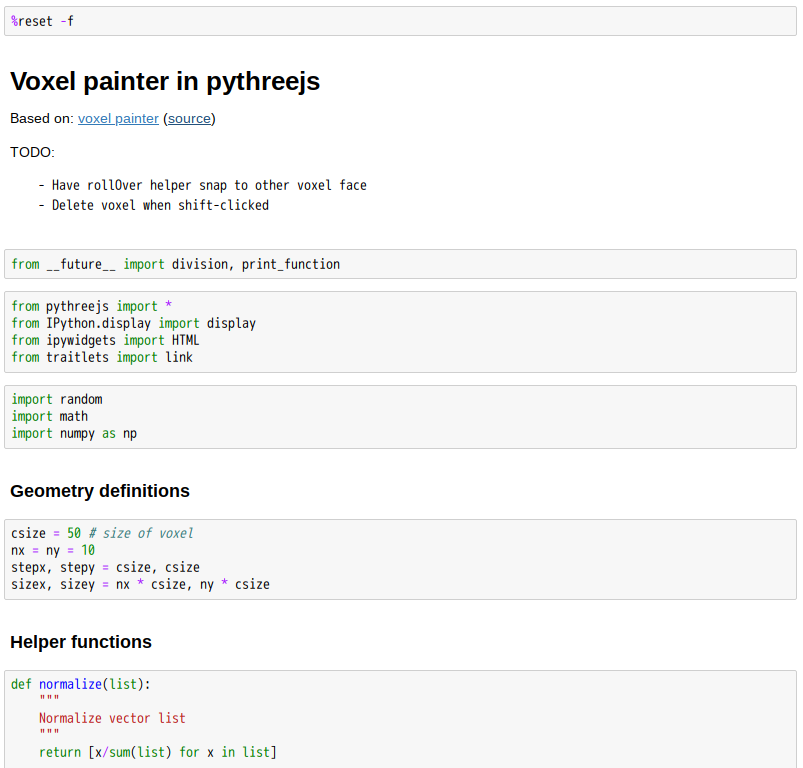
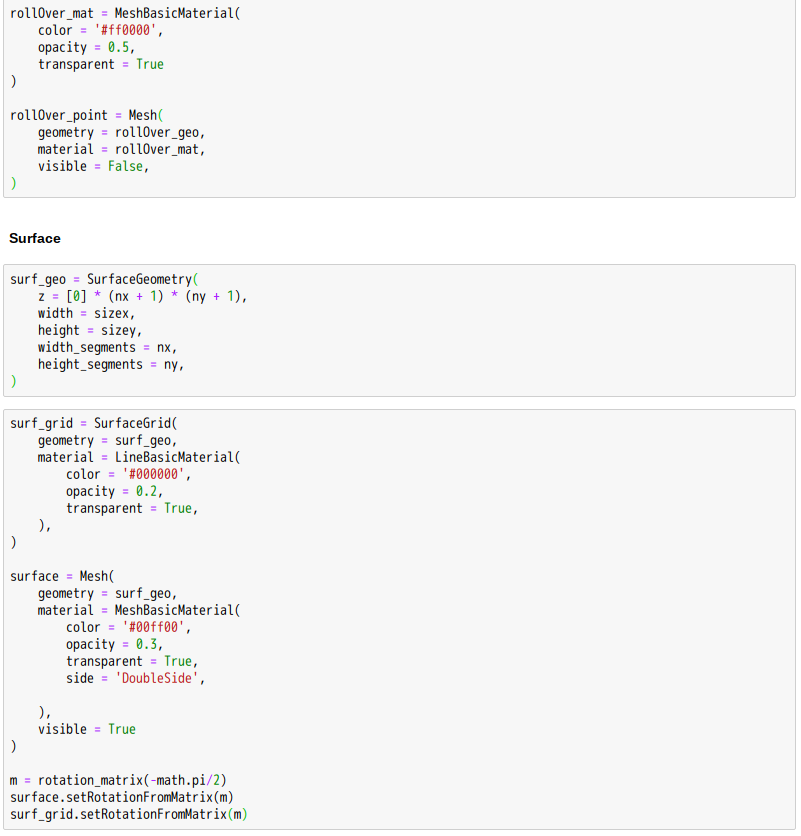
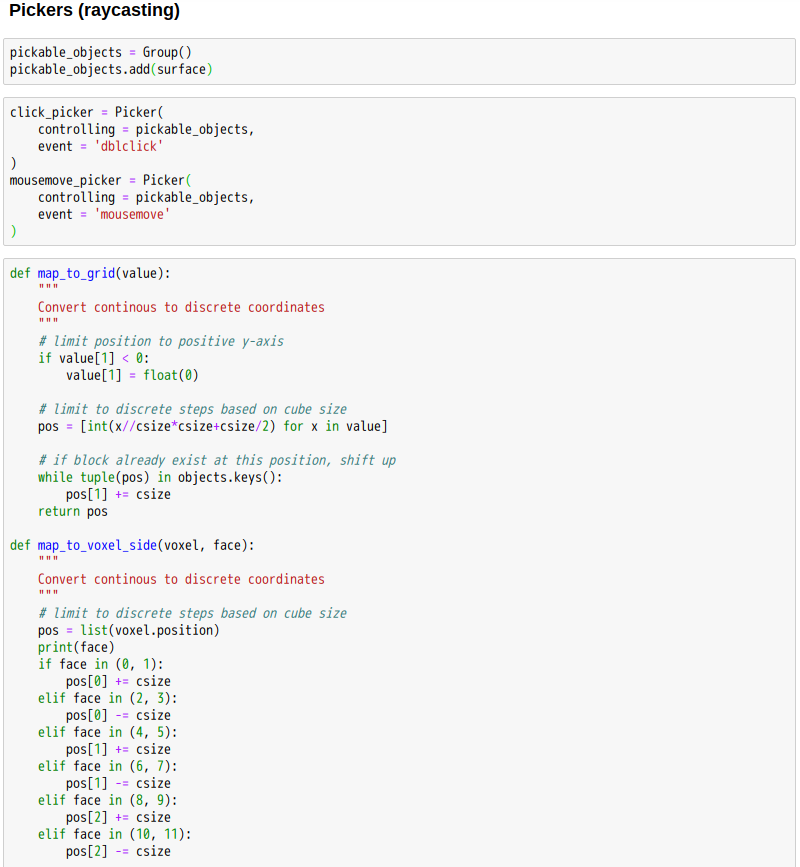
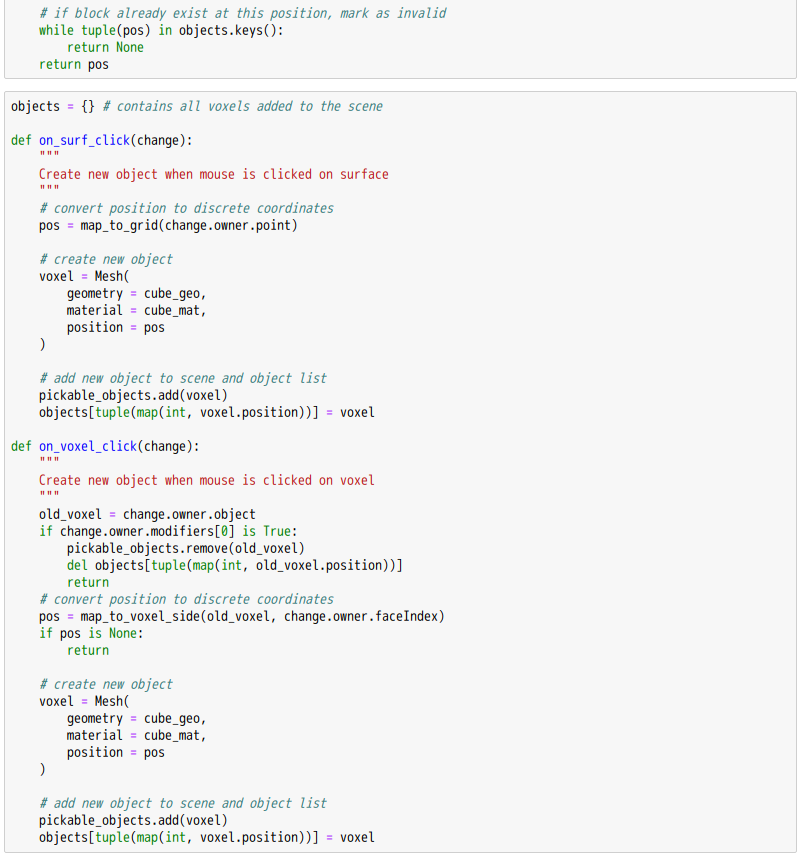
及其範例
This section contains several examples generated from Jupyter notebooks. The widgets have been embedded into the page.
且思可有快速掌握 之法?!作者不知,莫我問也!?
不過若不得不時,會用『倒吃甘蔗』、『反織蛛網』挑戰之矣☆★


oliverlee commented Jan 17, 2018