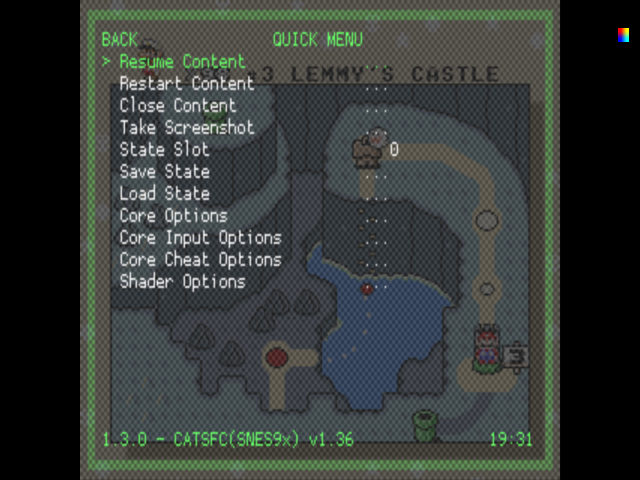
雖然作者不知如何向『乾坤借法』,但思解決『問題』時總是能夠『取法於人』的吧!比方說,因為文本圖示的需要,心想『擷取』當下螢幕之『快照』,否則怎麼簡易說明 RetroArch 『快捷選單』 QUICK MENU 呢?但是『快捷選單』必得在『遊戲進行中』,按下『Select』 + 『X』鍵才會顯示︰
那麼將怎麼『擷取』呢?非得用『照相機』來照嗎??
一時只覺『心有靈犀』,心中突現『昔日筆記』︰
Take screenshots/video’s without X server?
I have been trying various method’s but I have yet to get anything to work outside of x. I would like to get some screenshot’s of xbmc, omxplayer, retroarch, emulationstation, etc… These all seem to run without X. So how do I go about capturing the screen they run on? ffmpeg? x11grab is a no go, as these are not using X as far as I know. capturing the framebuffer via fbdev? I tried that, but I usually just end up with a black screenshot.
So can anyone point me in the right direction or better yet give me a example?
,於是乎豁然開朗!!仔細閱讀後,依樣畫葫蘆︰
# ※ 將之命名為 raspimovie #!/bin/bash count=1000 while [count + 1` raspi2png -h 480 -w 640 -p ~/screens/${count:1}.png done
接著取得
raspi2png
Utility to take a snapshot of the raspberry pi screen and save it as a PNG file
raspi2png -h
raspi2png: option requires an argument — ‘h’
Usage: raspi2png [–pngname name] [–width <width>] [–height <height>] [–compression <level>] [–delay <delay>] [–display <number>] [–stdout] [–help]
–pngname,-p – name of png file to create (default is snapshot.png)
–height,-h – image height (default is screen height)
–width,-w – image width (default is screen width)
–compression,-c – PNG compression level (0 – 9)
–delay,-d – delay in seconds (default 0)
–display,-D – Raspberry Pi display number (default 0)
–stdout,-s – write file to stdout
–help,-H – print this usage information
又思何不做成『影片』耶??!!
─── 《W!O+ 的《小伶鼬工坊演義》︰【新春】 復古派 《六》 RETROPIE 借法》
想當初因為文本圖示的需要,所以用 raspi2png 擷取螢幕的快照。
由於樹莓派影格緩衝區
RPi Framebuffer
Introduction
The aim of this page is to provide some documentation on BCM2835’s frame buffer, as this is not publicly documented by Broadcom, and is necessary to write a basic OS for the Raspberry Pi. Most of this was worked out by reading the Linux source code (mostly drivers/video/bcm2708_fb.c and arch/arm/mach-bcm2708/) and experimentation. Note: At times I have used a different naming convention to that used by Broadcom’s kernel source, partially because I used slightly different semantics where the kernel source is either unclear or seemed confusing. A working (more or less) example code for the frame buffer can be found here (note: this page includes corrections to the large comment in fb.c).
Basic procedure to get stuff on screen
The basic procedure to get a frame buffer is:
- Set up a structure with the frame buffer specification (resolution, etc)
- Tell the GPU about this structure by writing to the mailbox
- Wait by reading from the mailbox for the GPU to modify this structure
- Write to the frame buffer at the pointer we got in stage 3
Notes
- Only step 4 is required for subsequent writes to the frame buffer.
- Currently, I do not know how to enable the HDMI output, so this will always operate the composite, and not the HDMI (there have been suggestions that this might be achieved using a combination of config.txt, parameters specified by the GPU, and appropriate resolution settings).
- This method works for both, HDMI and Composite output.
- The two conditions for successfully acquiring a frame buffer are:
- The 28 bits of data read from the mailbox is zero
- The pointer in the structure is non-zero after the mailbox read
- For some reason (that I haven’t discovered yet), the code sometimes fails (not meeting one of the two criteria above) unless it is retried. Hence steps 1-3 of the basic procedure are tried in a loop until success.
- Once we have the frame buffer, we can just write to it. The pixels (in 24 bit mode) are RGB ordered by y then x coordinate. The address of a subpixel is given by: y * pitch + x * 3 + rgb_channel, where rgb_channel is 0 for red, 1 for green, and 2 for blue.
與
Linux framebuffer

Knoppix booting on the framebuffer
The Linux framebuffer (fbdev) is a graphic hardware-independent abstraction layer to show graphics on a computer monitor, typically on the console.[1] The word framebuffer means a part of video memory containing a current video frame, and the Linux framebuffer means “access method to the framebuffer under the Linux kernel”, without relying on system-specific libraries such as SVGALib or another user space software.
有差異,或許 raspi2png 還是最好用的呦☆
誰知道,當小朋友看到擷圖後,鬧著要『過關能剪影』哩!
不過當時缺乏適當使用者界面,只得作罷也☻
今日打算借這個樹莓派復古遊戲機外殼上的
‧ resetPin
‧ ledPin
※ 註︰
retroflag-picase/SafeShutdown.py
#!/usr/bin/env python3
from gpiozero import Button, LED
import os
from signal import pause

powerPin = 3
resetPin = 2
ledPin = 14
powerenPin = 4
hold = 1
led = LED(ledPin)
led.on()
power = LED(powerenPin)
power.on()

#functions that handle button events
def when_pressed():
  led.blink(.2,.2)
  os.system("sudo killall emulationstation && sleep 5s && sudo shutdown -h now")
def when_released():
  led.on()
def reboot():
  os.system("sudo killall emulationstation && sleep 5s && sudo reboot")

btn = Button(powerPin, hold_time=hold)
rebootBtn = Button(resetPin)
rebootBtn.when_pressed = reboot
btn.when_pressed = when_pressed
btn.when_released = when_released
pause()
作 User Interface ,寫個一按 LED 閃爍‧開始連續擷取;再按 LED 停止閃爍‧結束快照之派生三小程式勒☺