雖然
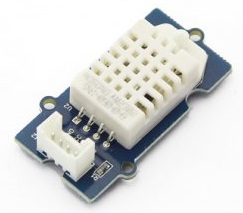
Grove – Temperature and Humidity Sensor Pro
中文 Go pro in temperature and relative humidity measurement applications with this Grove gadget. This is a powerful sister version of our Grove – Temperature and Humidity Sensor. It has more complete and accurate performance than the basic version. The detecting range of this sensor is 5% RH – 99% RH, and -40°C – 80°C. And its accuracy satisfyingly reaches up to 2% RH and 0.5°C. A professional choice for applications that have relatively strict requirements.
Specification
| Item | Parameter | Min | Norm | Max | Unit |
|---|---|---|---|---|---|
| VCC | – | 3.3 | – | 6 | V |
| Measuring Current Supply | – | 1 | – | 1.5 | mA |
| Standby Current Supply | – | 40 | – | 50 | uA |
| Measuring range | Humidity | 5% | – | 99% | RH |
| Temperature | -40 | – | 80 | °C | |
| Accuracy | Humidity | – | – | ±2% | RH |
| Temperature | – | – | ±0.5 | °C | |
| Resolution | Humidity | – | – | 0.1% | RH |
| Temperature | – | – | 0.1 | °C | |
| Repeatability | Humidity | – | – | ±0.3% | RH |
| Temperature | – | – | ±0.2 | °C | |
| Long-term Stability | – | – | – | ±0.5% | RH/year |
| Signal Collecting Period | – | – | 2 | – | S |
| Respond Time | 1/e(63%) | 6 | – | 20 | S |
───
是連接在『小樹林系統』之『數位埠』上,但是只要粗略考察 Grove System 派生界面原始碼︰
【 GrovePi/Software/Python/grovepi.py 】
# line 284
# Read and return temperature and humidity from Grove DHT Pro
def dht(pin, module_type):
        write_i2c_block(address, dht_temp_cmd + [pin, module_type, unused])

        # Delay necessary for proper reading fron DHT sensor
        time.sleep(.6)
        try:
                read_i2c_byte(address)
                number = read_i2c_block(address)
                time.sleep(.1)
                if number == -1:
                        return -1
        except (TypeError, IndexError):
                return -1
        # data returned in IEEE format as a float in 4 bytes

        if p_version==2:
                h=''
                for element in (number[1:5]):
                        h+=chr(element)

                t_val=struct.unpack('f', h)
                t = round(t_val[0], 2)

                h = ''
                for element in (number[5:9]):
                        h+=chr(element)

                hum_val=struct.unpack('f',h)
                hum = round(hum_val[0], 2)
        else:
                t_val=bytearray(number[1:5])
                h_val=bytearray(number[5:9])
                t=round(struct.unpack('f',t_val)[0],2)
                hum=round(struct.unpack('f',h_val)[0],2)
        return [t, hum]
以及韌體 Source Code ︰
【 GrovePi/Firmware/Source/v1.2/grove_pi_v1_2_5/DHT.cpp 】
# line 82
boolean DHT::read(void) {
  uint8_t laststate = HIGH;
  uint8_t counter = 0;
  uint8_t j = 0, i;
  unsigned long currenttime;

  // pull the pin high and wait 250 milliseconds
  digitalWrite(_pin, HIGH);
  delay(250);

  currenttime = millis();
  if (currenttime < _lastreadtime) {
    // ie there was a rollover
    _lastreadtime = 0;
  }
  if (!firstreading && ((currenttime - _lastreadtime) < 2000)) {
    return true; // return last correct measurement
    //delay(2000 - (currenttime - _lastreadtime));
  }
  firstreading = false;
  /*
    Serial.print("Currtime: "); Serial.print(currenttime);
    Serial.print(" Lasttime: "); Serial.print(_lastreadtime);
  */
  _lastreadtime = millis();

  data[0] = data[1] = data[2] = data[3] = data[4] = 0;

  // now pull it low for ~20 milliseconds
  pinMode(_pin, OUTPUT);
  digitalWrite(_pin, LOW);
  delay(20);
  cli();
  digitalWrite(_pin, HIGH);
  delayMicroseconds(40);
  pinMode(_pin, INPUT);

  // read in timings
  for ( i=0; i< MAXTIMINGS; i++) {
    counter = 0;
    while (digitalRead(_pin) == laststate) {
      counter++;
      delayMicroseconds(1);
      if (counter == 255) {
        break;
      }
    }
    laststate = digitalRead(_pin);

    if (counter == 255) break;

    // ignore first 3 transitions
    if ((i >= 4) && (i%2 == 0)) {
      // shove each bit into the storage bytes
      data[j/8] <<= 1;
      if (counter > _count)
        data[j/8] |= 1;
      j++;
    }
  }

  sei();

  /*
  Serial.println(j, DEC);
  Serial.print(data[0], HEX); Serial.print(", ");
  Serial.print(data[1], HEX); Serial.print(", ");
  Serial.print(data[2], HEX); Serial.print(", ");
  Serial.print(data[3], HEX); Serial.print(", ");
  Serial.print(data[4], HEX); Serial.print(" =? ");
  Serial.println(data[0] + data[1] + data[2] + data[3], HEX);
  */

  // check we read 40 bits and that the checksum matches
  if ((j >= 40) &&
      (data[4] == ((data[0] + data[1] + data[2] + data[3]) & 0xFF)) ) {
    return true;
  }


  return false;

}
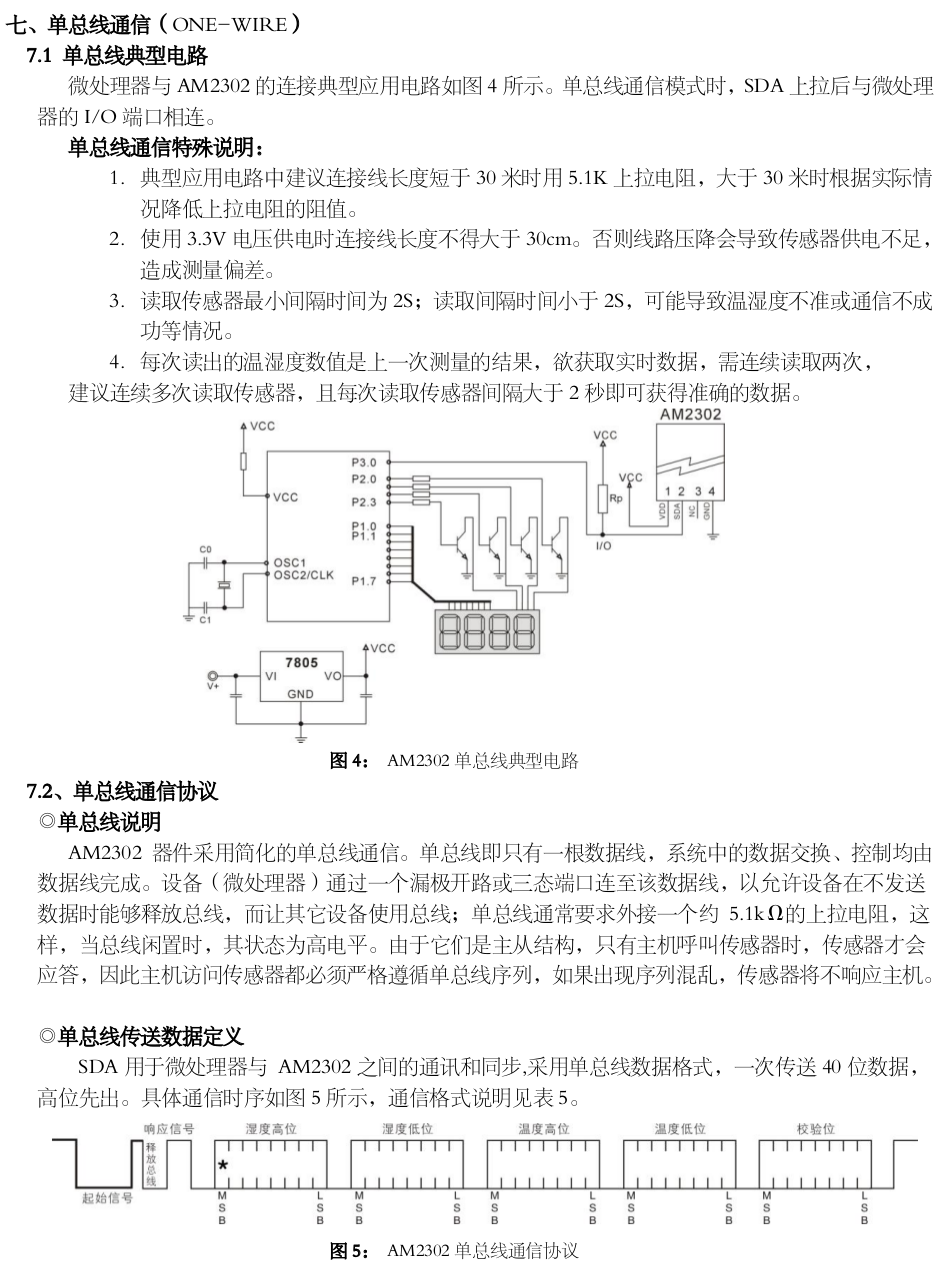
就可以發現這可不是簡單的『 0 』與『 1 』狀態而已,而是一種『單線』 One Wire 種類之『存取規範』。因此必須細讀 AM2302 溫‧濕度感測器之 Data Sheet ︰
才能了解與解讀韌體寫作的程式邏輯。
雖說樹莓派上也有
1-Wire
1-Wire is a device communications bus system designed by Dallas Semiconductor Corp. that provides low-speed data, signaling, and power over a single signal.[1] 1-Wire is similar in concept to I²C, but with lower data rates and longer range. It is typically used to communicate with small inexpensive devices such as digital thermometers and weather instruments. A network of 1-Wire devices with an associated master device is called a MicroLAN.
One distinctive feature of the bus is the possibility of using only two wires: data and ground. To accomplish this, 1-Wire devices include an 800 pF capacitor to store charge, and to power the device during periods when the data line is active.
───
GPIO 界面,之前在《勇闖新世界︰ 《 Kernel 4.X 》之整裝蓄勢‧事件驅動 →→ 設備管理及應用》文本中也曾談過︰
最後就讓我們再次回到『DS18B20』數位環境溫度感測器,當我們已經設定了『w1-gpio』的 dtoverlay ,也安裝了感測器,我們怎麼知道裝置正確工作了呢?也許可以用
pi@raspberrypi ~cd /sys/bus/w1/devices/
# 28-021463ab43ff 某個『DS18B20』數位環境溫度感測器
pi@raspberrypi /sys/bus/w1/devicescd 28-021463ab43ff
pi@raspberrypi /sys/bus/w1/devices/28-021463ab43ffcat name
28-021463ab43ff# 第一行的 YES 代表第二行溫度取得正確,若是 NO 代表溫度取得錯誤。
# 讀取溫度, t=35937 意味 35937/1000 = 35.937 °C
pi@raspberrypi /sys/bus/w1/devices/28-021463ab43ffSSD \ = \ (1.818 \times \ T \ + \ 18.18) \times \ (0.88 \ + \ 0.002 \ \times \ H) \ + \ \frac{(T \ - \ 32)}{(45 \ - \ T)} \ - \ 3.2 \times \ W \ + \ 18.2
(1.818 \times \ T \ + \ 18.18) \times \ (0.88 \ + \ 0.002 \ \times \ H) \ + \ \frac{(T \ - \ 32)}{(45 \ - \ T)} \ + \ 18.2$
就好!若問程式『加寫』在哪好呢?依舊是『費思量』的哩???